User Guide
Welcome to Socius User Guide!
Welcome to Socius User Guide!
If you are a CS2103T student who is using Socius, or just someone who wants to find out more about what Socius can do, you are at the right place!
In this user guide, you will find step-by-step instructions on how you can install Socius and guide on how to use all of its features.
Are you a developer? Make sure to check out our Developer Guide too!
We hope that you will have a great time using Socius! :)
Table of Contents
- Introduction to Socius
- Using this guide
- Quick start
- Features
- Parameter Constraints
- FAQ
- Glossary
- Authors
- Command Summary
Introduction to Socius
Socius is a desktop application that helps you, as a CS2103T Software Engineering student, to
- manage your classmates’ contacts,
- make friends, and
- find teammates!
Socius provides these main features:
- Access details of students taking CS2103T.
- Find any student with name, tutorial group, nationality, tags, and more.
- Add suitable tags to categorize students.
- View nationality statistics of a tutorial class.
Socius is optimized for use via a Command Line Interface (CLI) while still having the benefits of a Graphical User Interface (GUI). If you can type fast, Socius can get your contact management tasks done faster than traditional GUI apps.
Using this guide
This user guide familarises you with all the latest features of Socius, enabling you to get the most out of Socius!
If you are a new user, this guide provides you with all the basic knowledge to get started with Socius.
If you are an experienced user, a Command Summary table is available at the end of the user guide for your reference.
Before exploring the features of Socius, you should be familiar with these symbols used in this user guide.
| Symbol | Meaning |
|---|---|
| Important information | |
| Warning or caution | |
| Additional information such as tips | |
| Help with common technical issues |
Quick Start
Here is a quick start on how to use Socius on your computer.
-
Ensure you have Java 11 installed on your computer.
-
Download the latest
Socius.jarfrom here. -
Move the
Socius.jarfile to a folder you want to use as the home folder for Socius. -
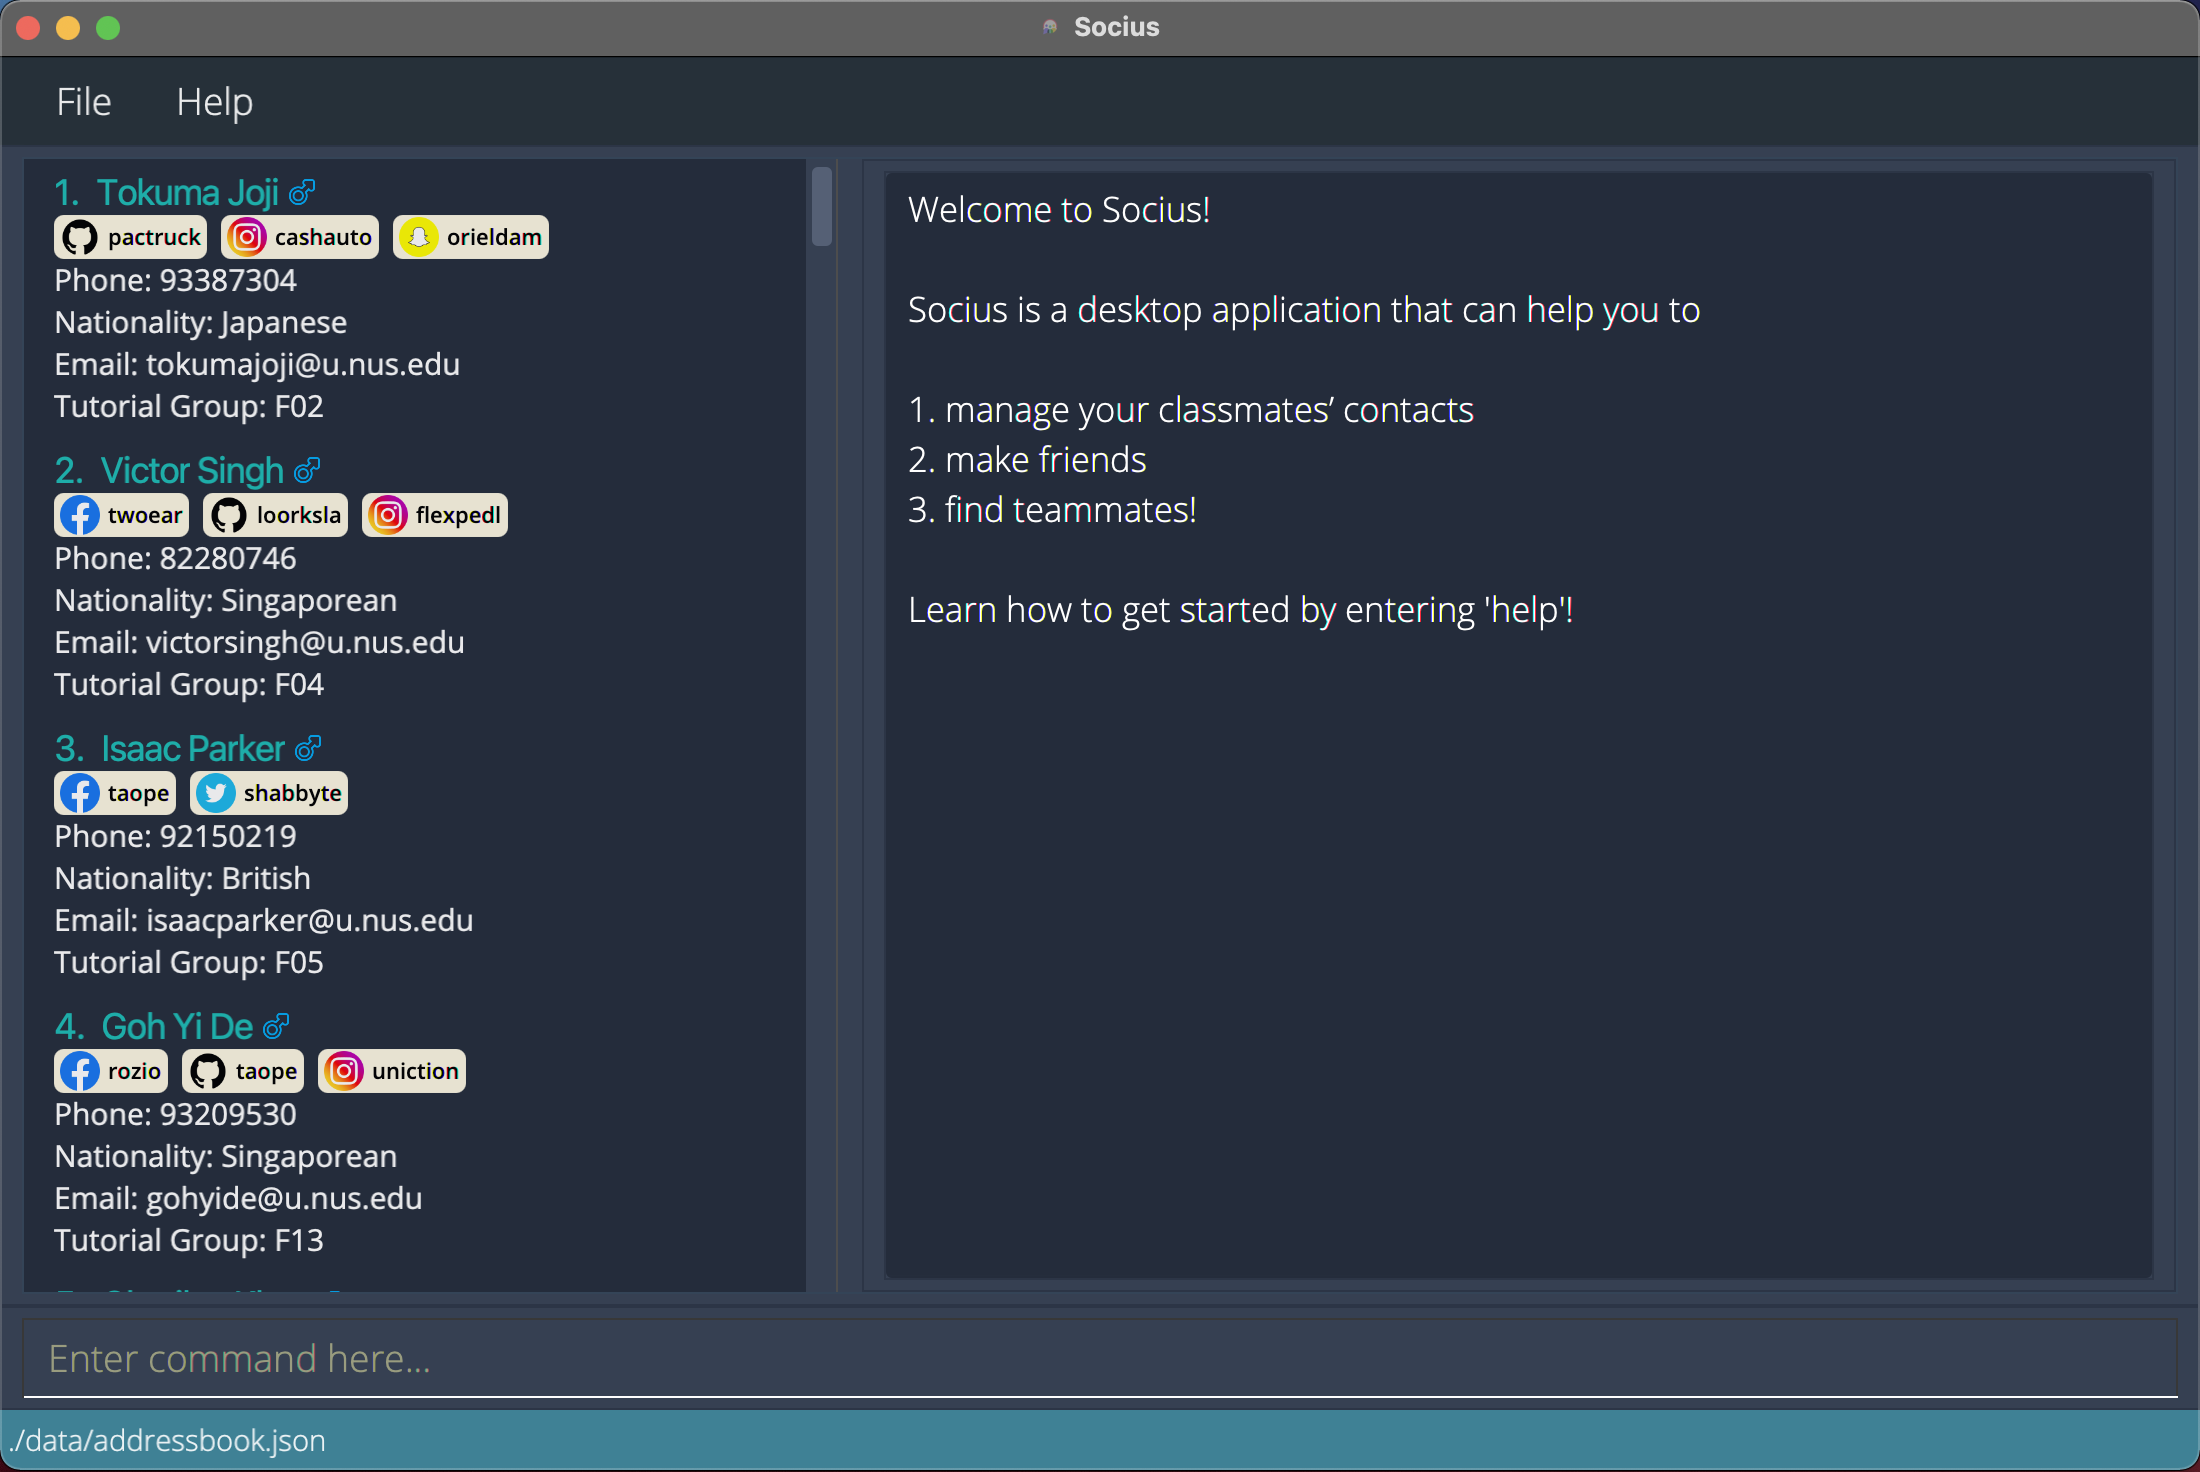
Double-click the file to start Socius. A GUI similar to the one below should appear within a few seconds.
![]() Help:
If double-clicking does not work, you can use the Terminal and type
Help:
If double-clicking does not work, you can use the Terminal and type java -jar Socius.jar. Ensure that the Terminal is in the same directory as the Socius.jar file.
-
Note that the app comes with some sample contacts by default. Type
clearin the command box to remove those sample contacts. - Type your command in the command box and press
Enterto execute the command. e.g. typinghelpand pressingEnterwill open the help window. These are some example commands that you can try:-
addn/Amy Tan nat/Singaporean tg/W08: Adds a person named Amy Tan, a Singaporean from tutorial group W08 to your contacts. -
delete3: Deletes the 3rd contact shown in the current list. -
find:g/f nat/Singaporean: Finds all female Singaporeans from your contacts. -
list: Lists all contacts. -
clear: Deletes all contacts. -
exit: Exits from Socius.
-
- Refer to the next section on Features for more details of each command. Alternatively, you can refer to the Command Summary for an overview of all commands.
Features
![]() Notes about the command format:
Notes about the command format:
-
Words in
UPPER_CASEare the parameters to be supplied by the user.
e.g. inadd n/NAME,NAMEis a parameter which can be used asadd n/John Tan. -
Items in square brackets are optional.
e.g.n/NAME [t/TAG]can be used asn/John Tan t/friendor asn/John Tan. -
Items with
… after them can be used multiple times including zero times.
e.g.[t/TAG]…can be used ast/friend,t/friend t/familyetc. -
Parameters can be in any order.
e.g. if the command specifiesn/NAME p/PHONE_NUMBER,p/PHONE_NUMBER n/NAMEis also acceptable. -
If a parameter is expected only once in the command but was specified it multiple times, only the last occurrence of the parameter will be taken. e.g. if you specify
p/12341234 p/56785678, onlyp/56785678will be taken. -
Extraneous parameters for commands that do not take in parameters (
help,list,exitandclear) will be ignored.
e.g. if the command specifieshelp 123, it will be interpreted ashelp.
Getting help: help
You can view the full list of commands available on Socius with the help command.
Format: help
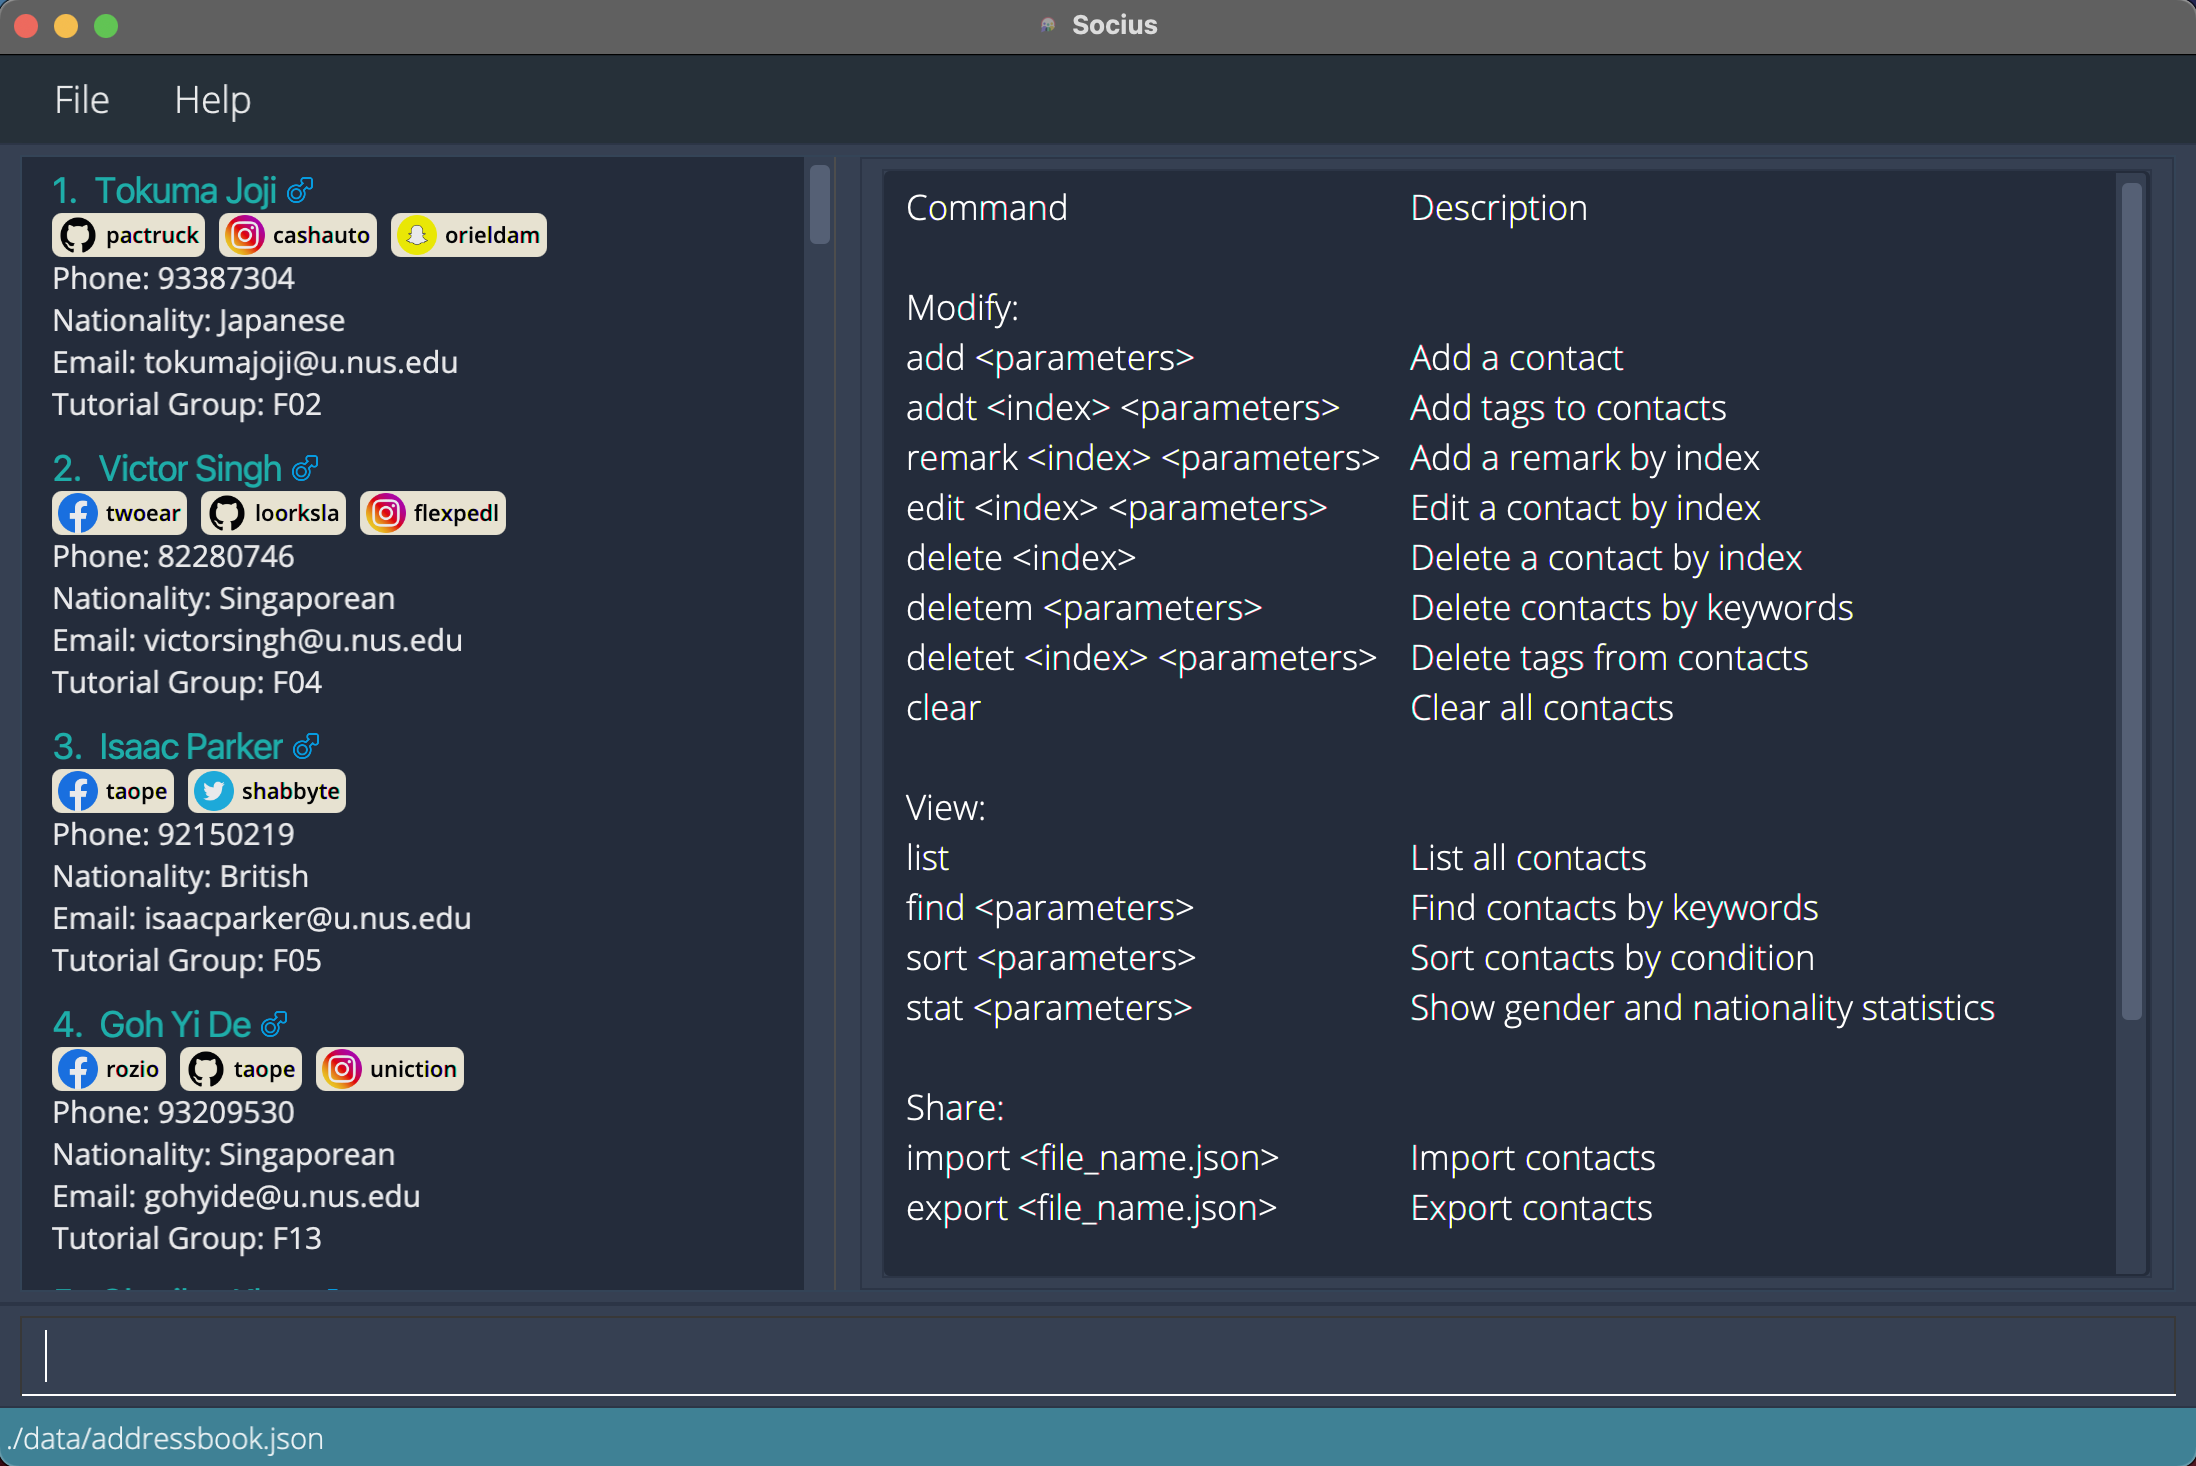 After execution of Help Command:
 help
Adding a person: add
You can add a new person into Socius with the add command.
Format: add n/NAME [p/PHONE_NUMBER] [e/EMAIL] [nat/NATIONALITY] [g/GENDER] [tg/TUTORIAL_GROUP] [s/SOCIAL_HANDLE]… [r/REMARK] [t/TAG]…
- Only the
NAMEparameter of a person is compulsory, other parameters are optional. - The parameters can be in any order.
- A person is considered a duplicate person when there is another person in the contact list with exactly the same details.
- If duplicate people are entered, these people will not be added.
Examples:
-
addn/Amy Tanadds a person named Amy Tan to the list. -
addn/Benedict p/98765432 e/ben@yahoo.com g/Madds a person named Benedict, a Male with phone number 98765432 and email ben@yahoo.com to your contact list. -
addn/Ernest s/tg:ernest2334 s/ig:ernessstadds a person named Ernest, with Telegram handle ‘earnest2334’ and Instagram handle ‘ernessst’ to your contact list.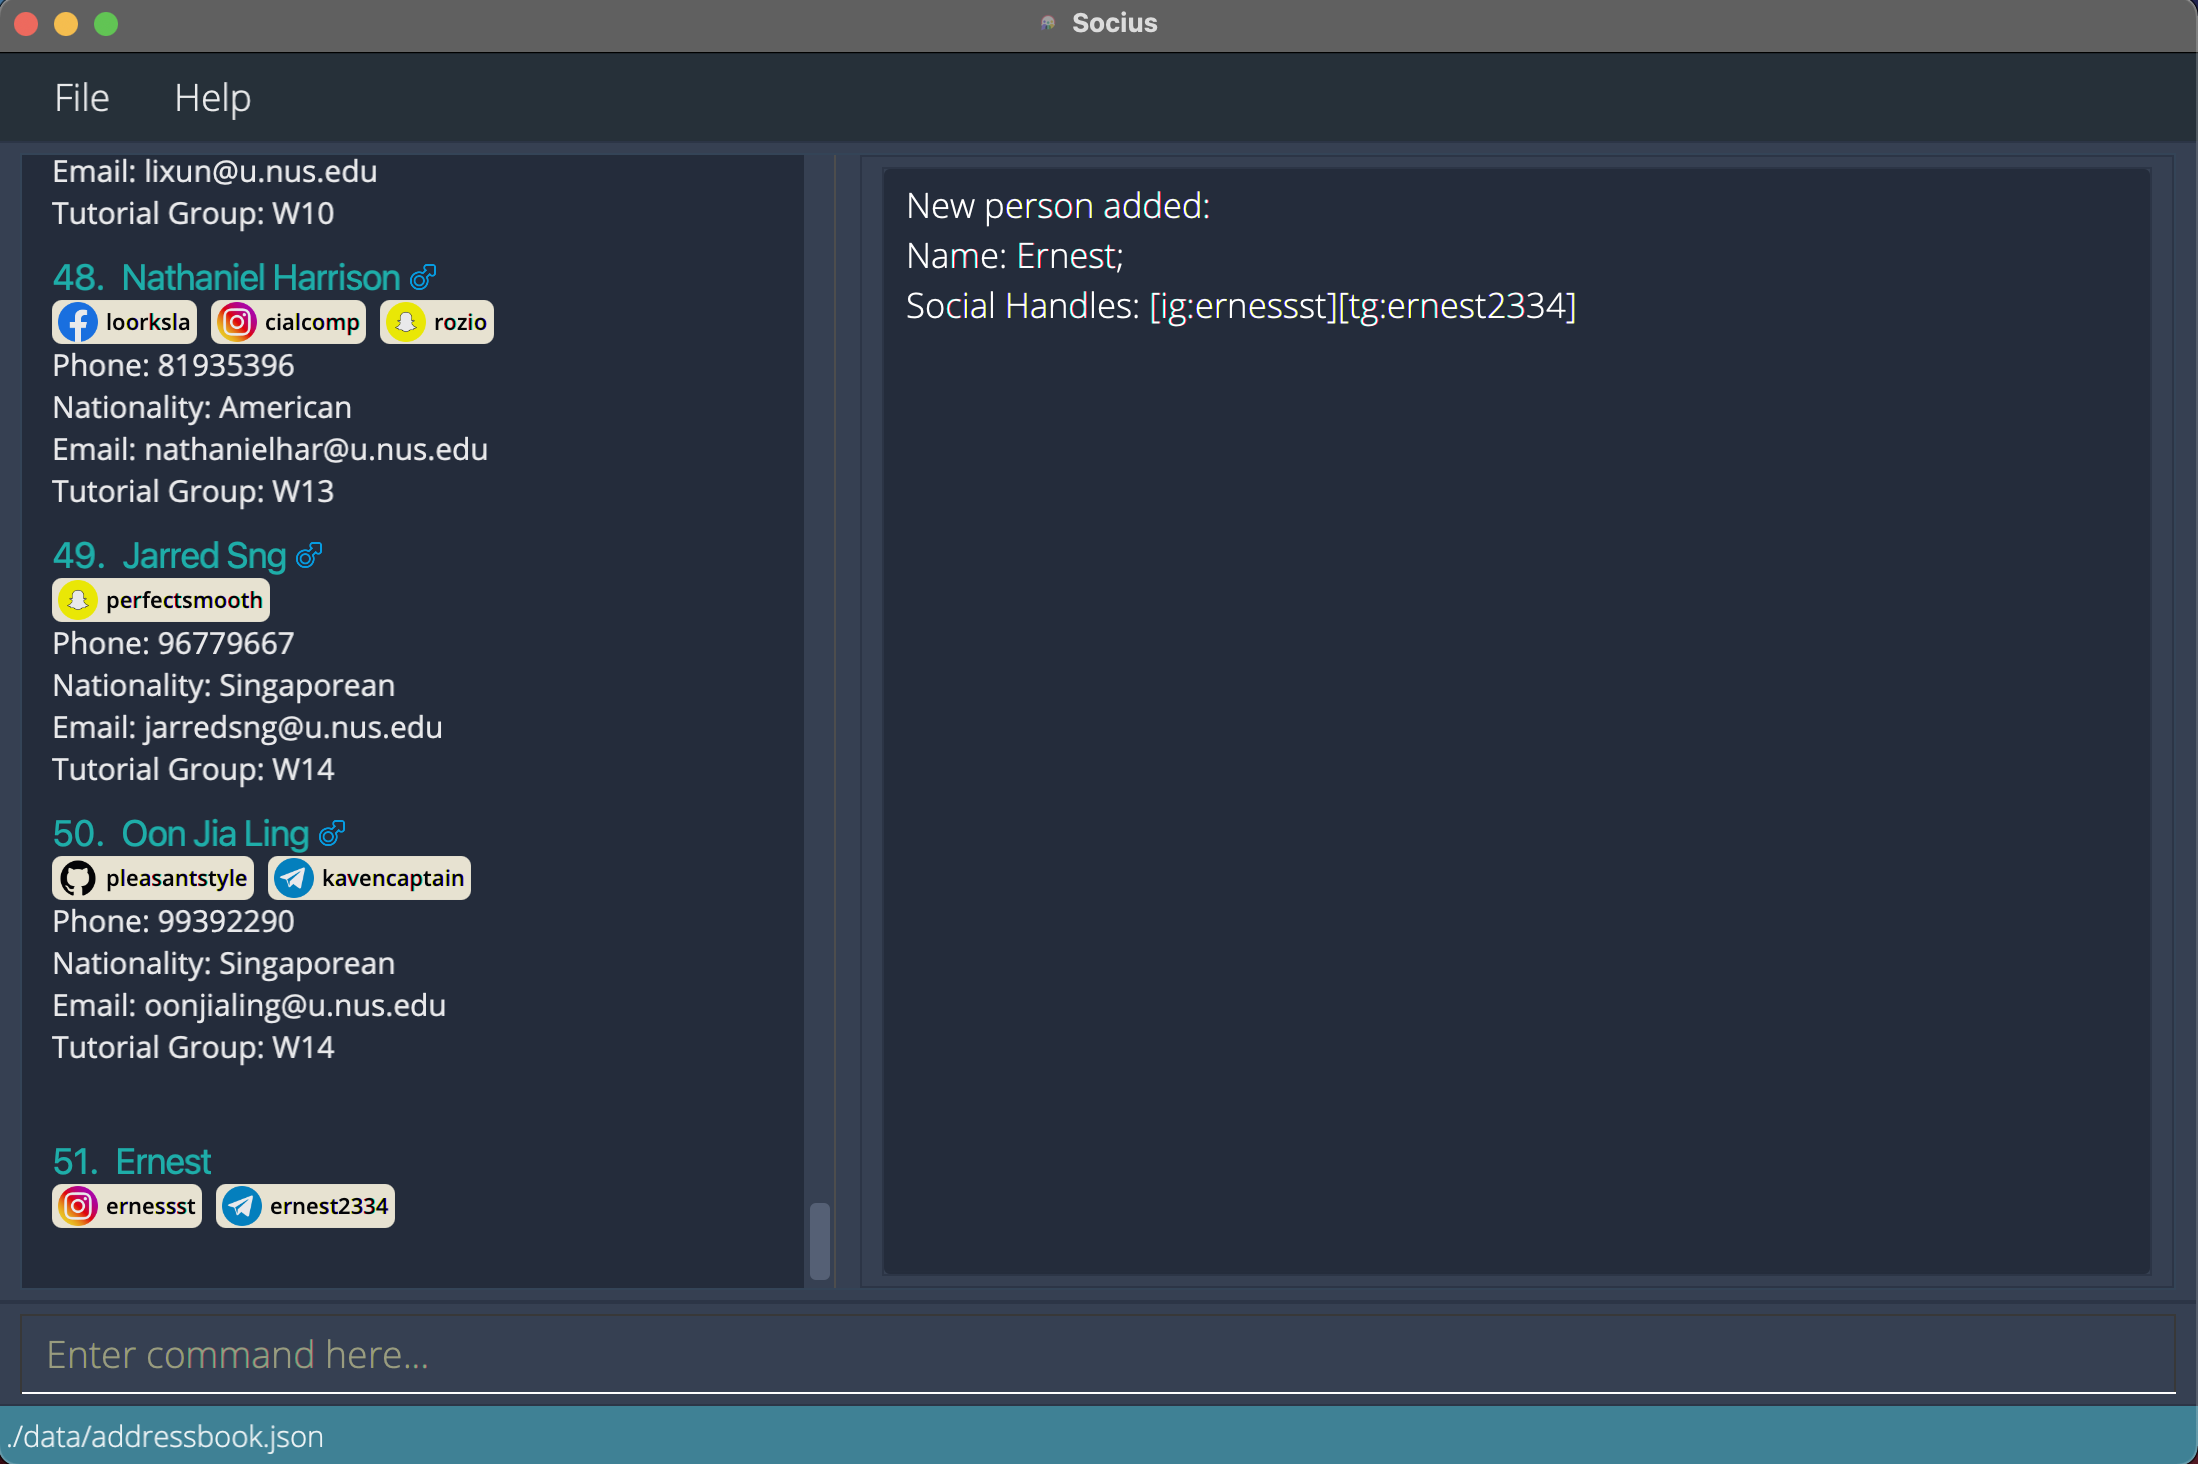 After execution of Add Command:
 addn/Ernest s/tg:ernest2334 s/ig:ernessst
Adding tags to people: addt
You can add tags to people in your contact list with the addt command.
You can add tags to one person with addt INDEX. Alternatively, you can add tags to everyone in the
displayed contact list by replacing INDEX with the word all (i.e. addt all).
Format: addt INDEX t/TAG [t/TAG]…
- Add tags to the person at the specified
INDEX. - The index refers to the index number shown in the displayed contact list.
- The index must be provided and must be a positive integer 1, 2, 3, …
- At least one
TAGmust be provided. -
TAGis case-sensitive. - Input tag will be appended to the existing tag.
- If duplicate tags are entered, these tags will not be added.
- If there are duplicate people after adding tags, these tags will not be added.
For example:
-
addt1 t/friendafterfindg/fadds the ‘friend’ tag to first person in the filtered list of female contacts. -
addt2 t/teammate t/neighbouradds both ‘teammate’ and ‘neighbour’ tags to second person in the displayed contact list.
Alternate Format: addt all t/TAG [t/TAG]…
- Add tags to everyone in the displayed contact list.
- At least one
TAGmust be provided. -
TAGis case-sensitive - Input tag will be appended to the existing tag.
- If duplicate tags are entered, these tags will not be added.
For example:
-
addtall t/friendafterfindg/fadds the ‘friend’ tag to everyone in the filtered list of female contacts. -
addtall t/teammate t/neighbouradds both ‘teammate’ and ‘neighbour’ tags to everyone in the displayed contact list.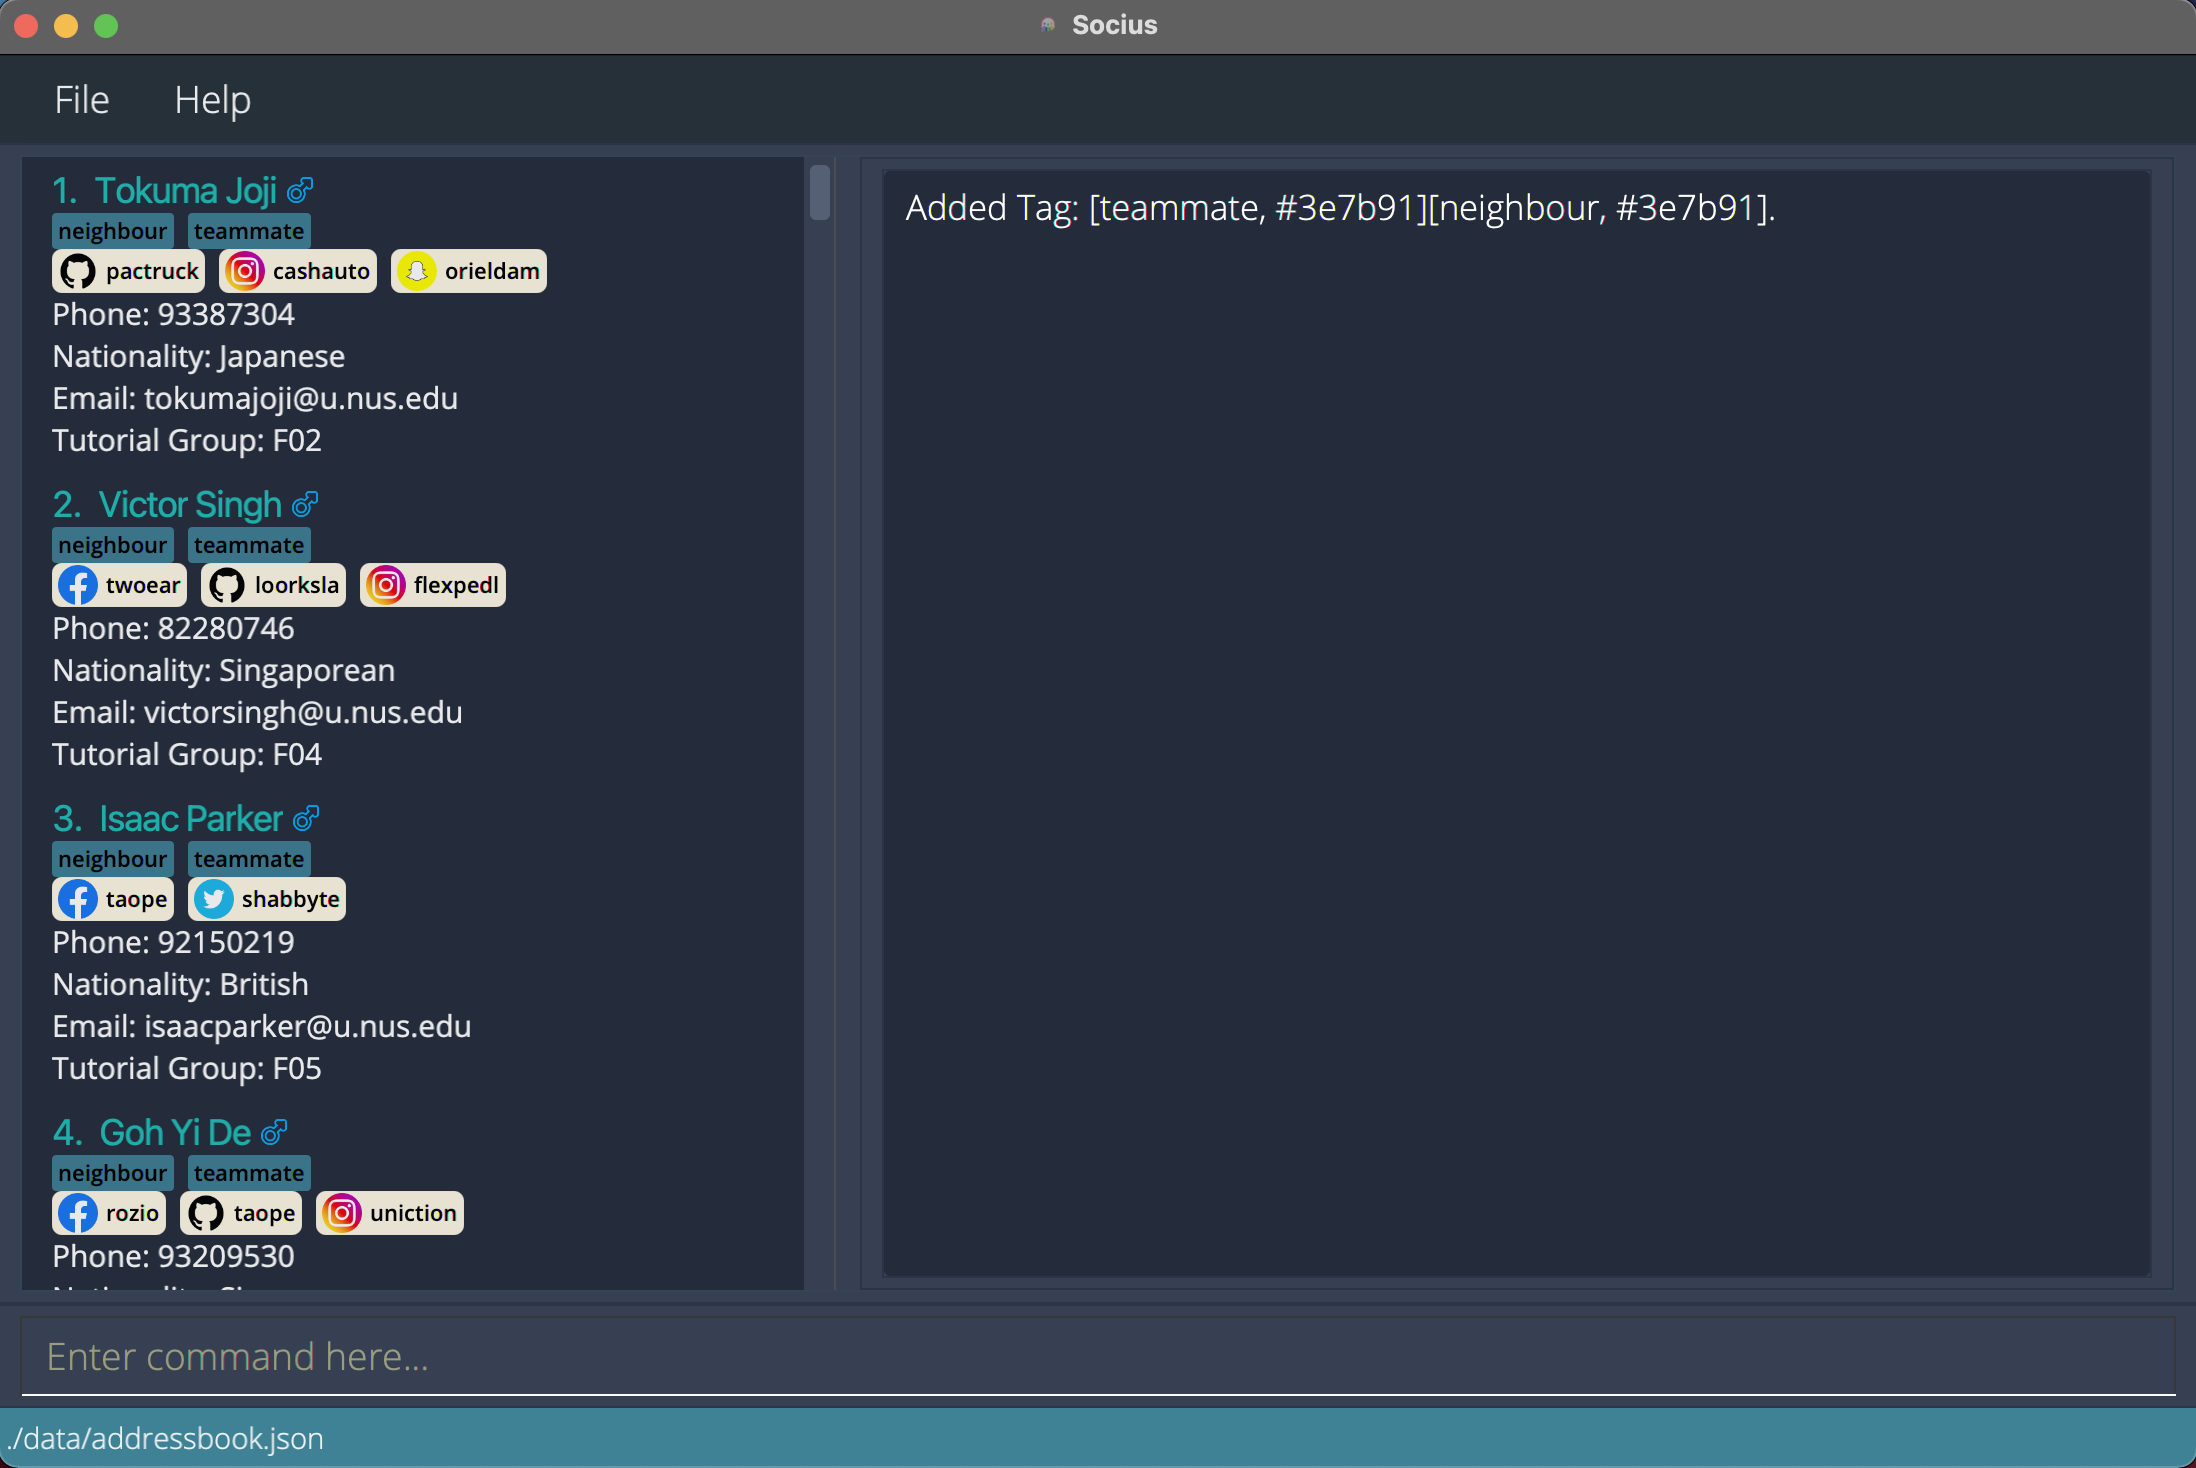 After execution of Add Tag Command:
 addtall t/teammate t/neighbour
Adding a remark to a person: remark
You can add a remark to a person in your contact list with the remark command.
Format: remark INDEX r/REMARK
- Add a remark to the person at the specified
INDEX. - The index refers to the index number shown in the displayed contact list.
- Index must be provided and must be a positive integer 1, 2, 3, …
- Existing remark will be updated to the input remark.
- If a duplicate remark is entered, only the latest remark will be taken.
- If there are duplicate people after adding remark, the remark will not be added.
Examples:
-
remark1 r/She likes codingadds the remark ‘She likes coding’ to first person in the displayed contact list.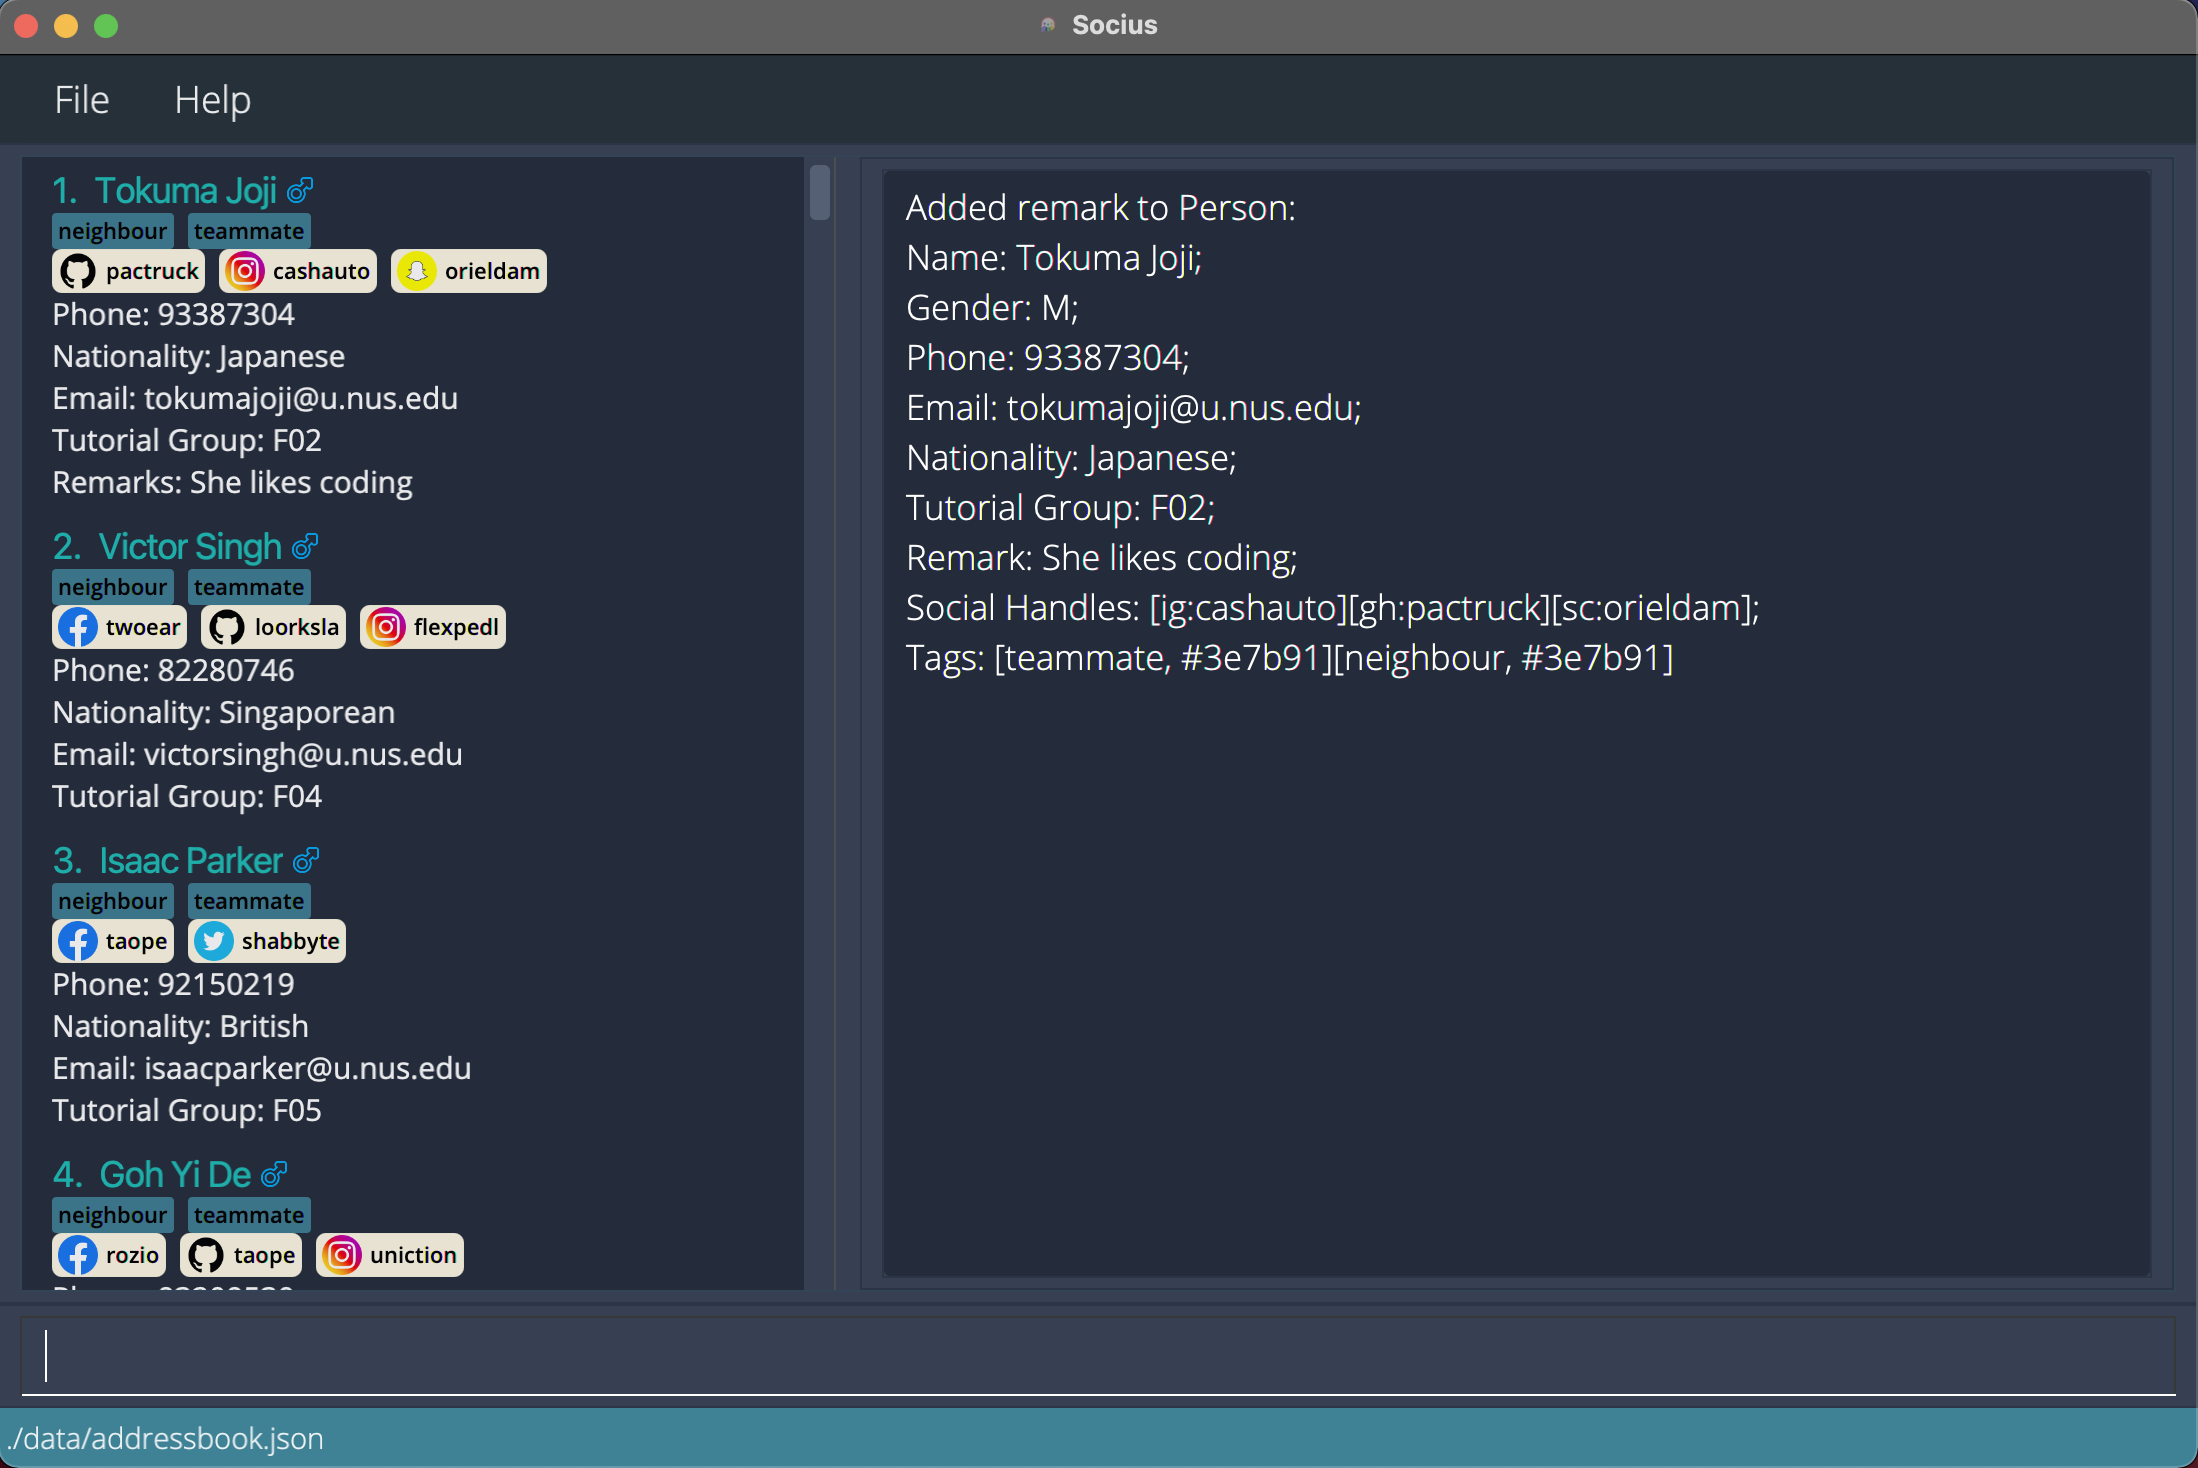 After execution of Remark Command:
 remark1 r/She likes coding
Editing a person: edit
You can edit an existing person in your contact list with the edit command.
Format: edit INDEX PREFIX/VALUE [PREFIX/VALUE]…
-
PREFIX/VALUEcan be substituted with any of the following:n/NAMEg/GENDERp/PHONE_NUMBERe/EMAILnat/NATIONALITYtg/TUTORIAL_GROUPs/SOCIAL_HANDLEr/REMARKt/TAG
- At least one parameter must be entered.
- Edits the person at the specified
INDEX. - The index refers to the index number shown in the displayed contact list.
- Index must be provided and must be a positive integer 1, 2, 3, …
- Existing values will be updated to the input values.
- You can remove a parameter of a person by leaving the
VALUEempty (i.e.edit INDEX PREFIX/)- For
s/SOCIAL_HANDLE, you can remove a social handle by leaving theUSERIDempty (i.e.s/PLATFORM:)
- For
- If duplicate parameters are entered, only the latest parameter will be taken.
- This does not apply to
s/SOCIAL_HANDLEandt/TAGas they accept multiple values.
- This does not apply to
- Existing tags will be updated to the input tag.
- You can remove all tags from a person by typing
t/without specifying any tags (i.e.edit INDEX t/). - If there are duplicate people after editing a person, the person will not be edited.
t/TAG:#HEX_COLOURExample:
t/friends:#FF0000 for a red colour tag
Examples:
-
edit1 p/91234567 e/amytan@example.comedits the phone number of the first person in the displayed contact list to 91234567 and the email address of that person to amytan@example.com. -
edit2 n/Benedict t/edits the name of the second person in the displayed contact list to Benedict and clears all his existing tags.
Deleting a person: delete
You can delete the specified person from your contact list with the delete command.
Format: delete INDEX
- Deletes the person at the specified
INDEX. - The index refers to the index number shown in the displayed contact list.
- Index must be provided and must be a positive integer 1, 2, 3, …
Examples:
-
delete2afterlistdeletes the second person in the displayed contact list from your contact list. -
delete1afterfindn/benedictdeletes the first person in the filtered contact list from your contact list.
Deleting multiple person: deletem
You can delete multiple person from the contact book with the deletem command.
Format: deletem PREFIX/VALUE [PREFIX/VALUE]…
-
PREFIX/VALUEcan be substituted with any of the following:n/NAMEg/GENDERp/PHONE_NUMBERe/EMAILnat/NATIONALITYtg/TUTORIAL_GROUPs/SOCIAL_HANDLEr/REMARKt/TAG
- At least one
VALUEmust be provided. -
VALUEis case-insensitive. (e.ghanswill matchHans) - People matching all parameters will be deleted (i.e.
ANDsearch).
Examples:
-
deletemn/jia lingdeletes Zhong Jia Ling and Oon Jia Ling.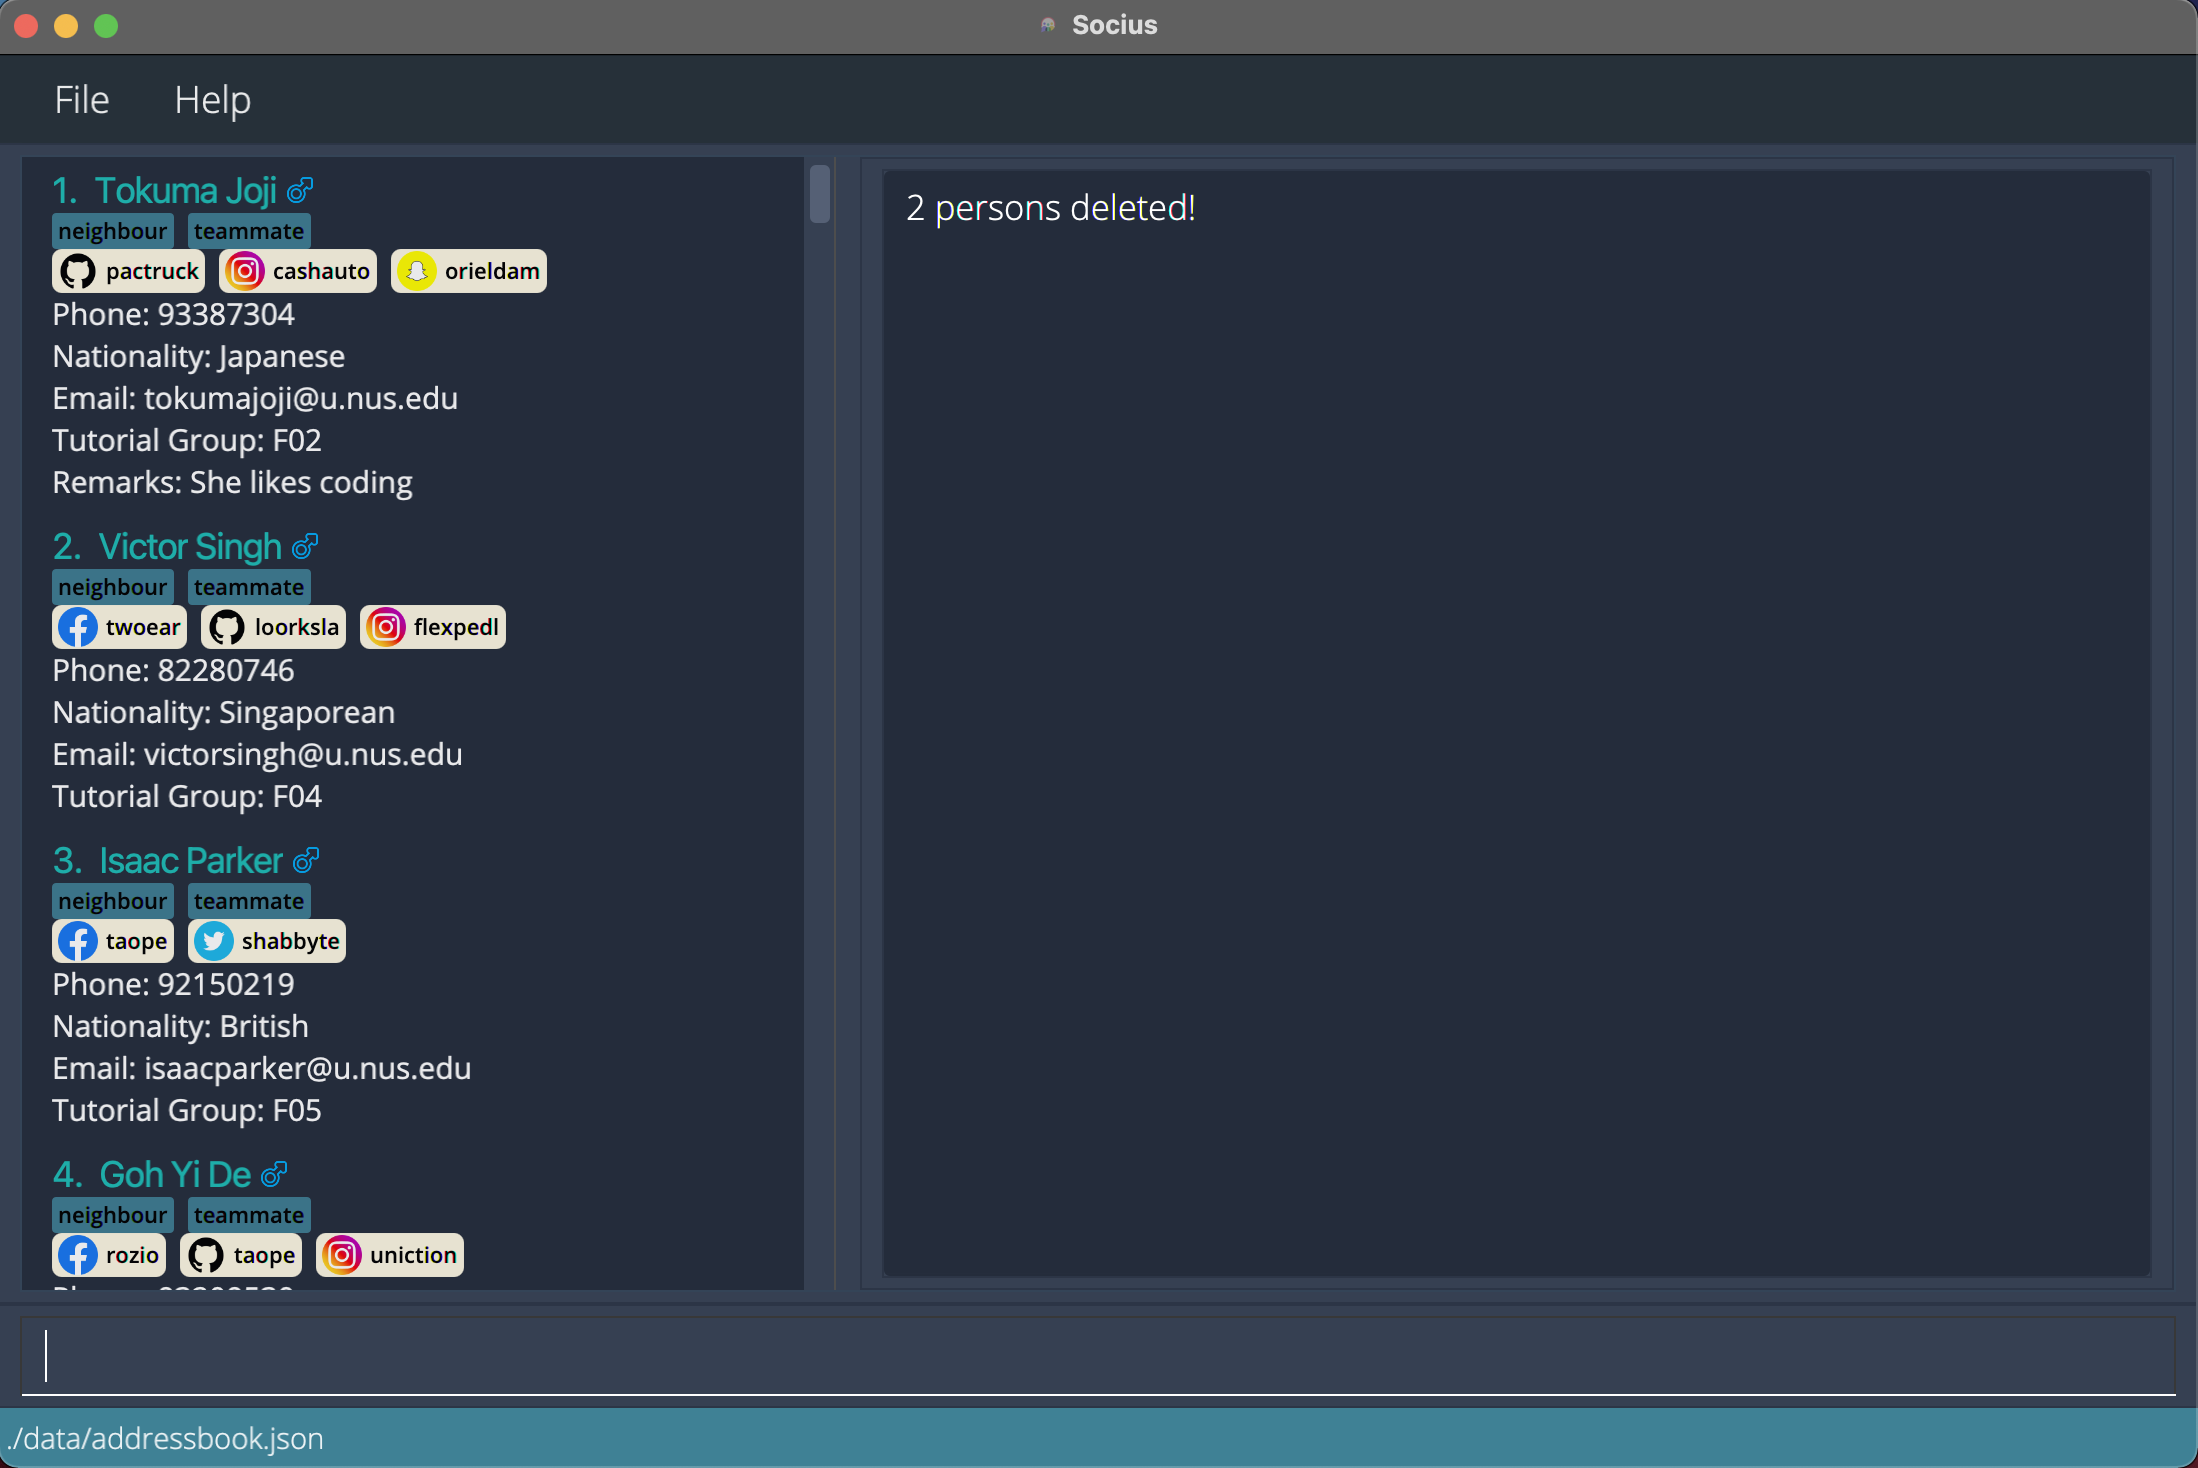 After execution of Delete Multiple Command:
 deletemn/jia ling
Deleting tags from people: deletet
You can delete tags for people in your contact list with the deletet command.
You can delete tags for one person with deletet INDEX. Alternatively, you can delete tags for everyone in the
displayed contact list by replacing INDEX with the word all (i.e. deletet all).
Format: deletet INDEX [t/TAG]…
- Delete tags for the person at the specified
INDEX. - The index refers to the index number shown in the displayed contact list.
- The index must be provided and must be a positive integer 1, 2, 3, …
- Existing tag will be removed if one of the input tags matches the existing tag.
- If no
TAGis provided, all tags of the person will be deleted. -
TAGis case-sensitive - If there are duplicate people after deleting tags, these tags will not be deleted.
For example:
-
deletet1 t/friendafterfindg/fdeletes the ‘friend’ tag for the first person in the filtered list of female contacts. -
deletet2 t/teammate t/neighbourdeletes the ‘teammate’ and ‘neighbour’ tags for the second person in the displayed contact list.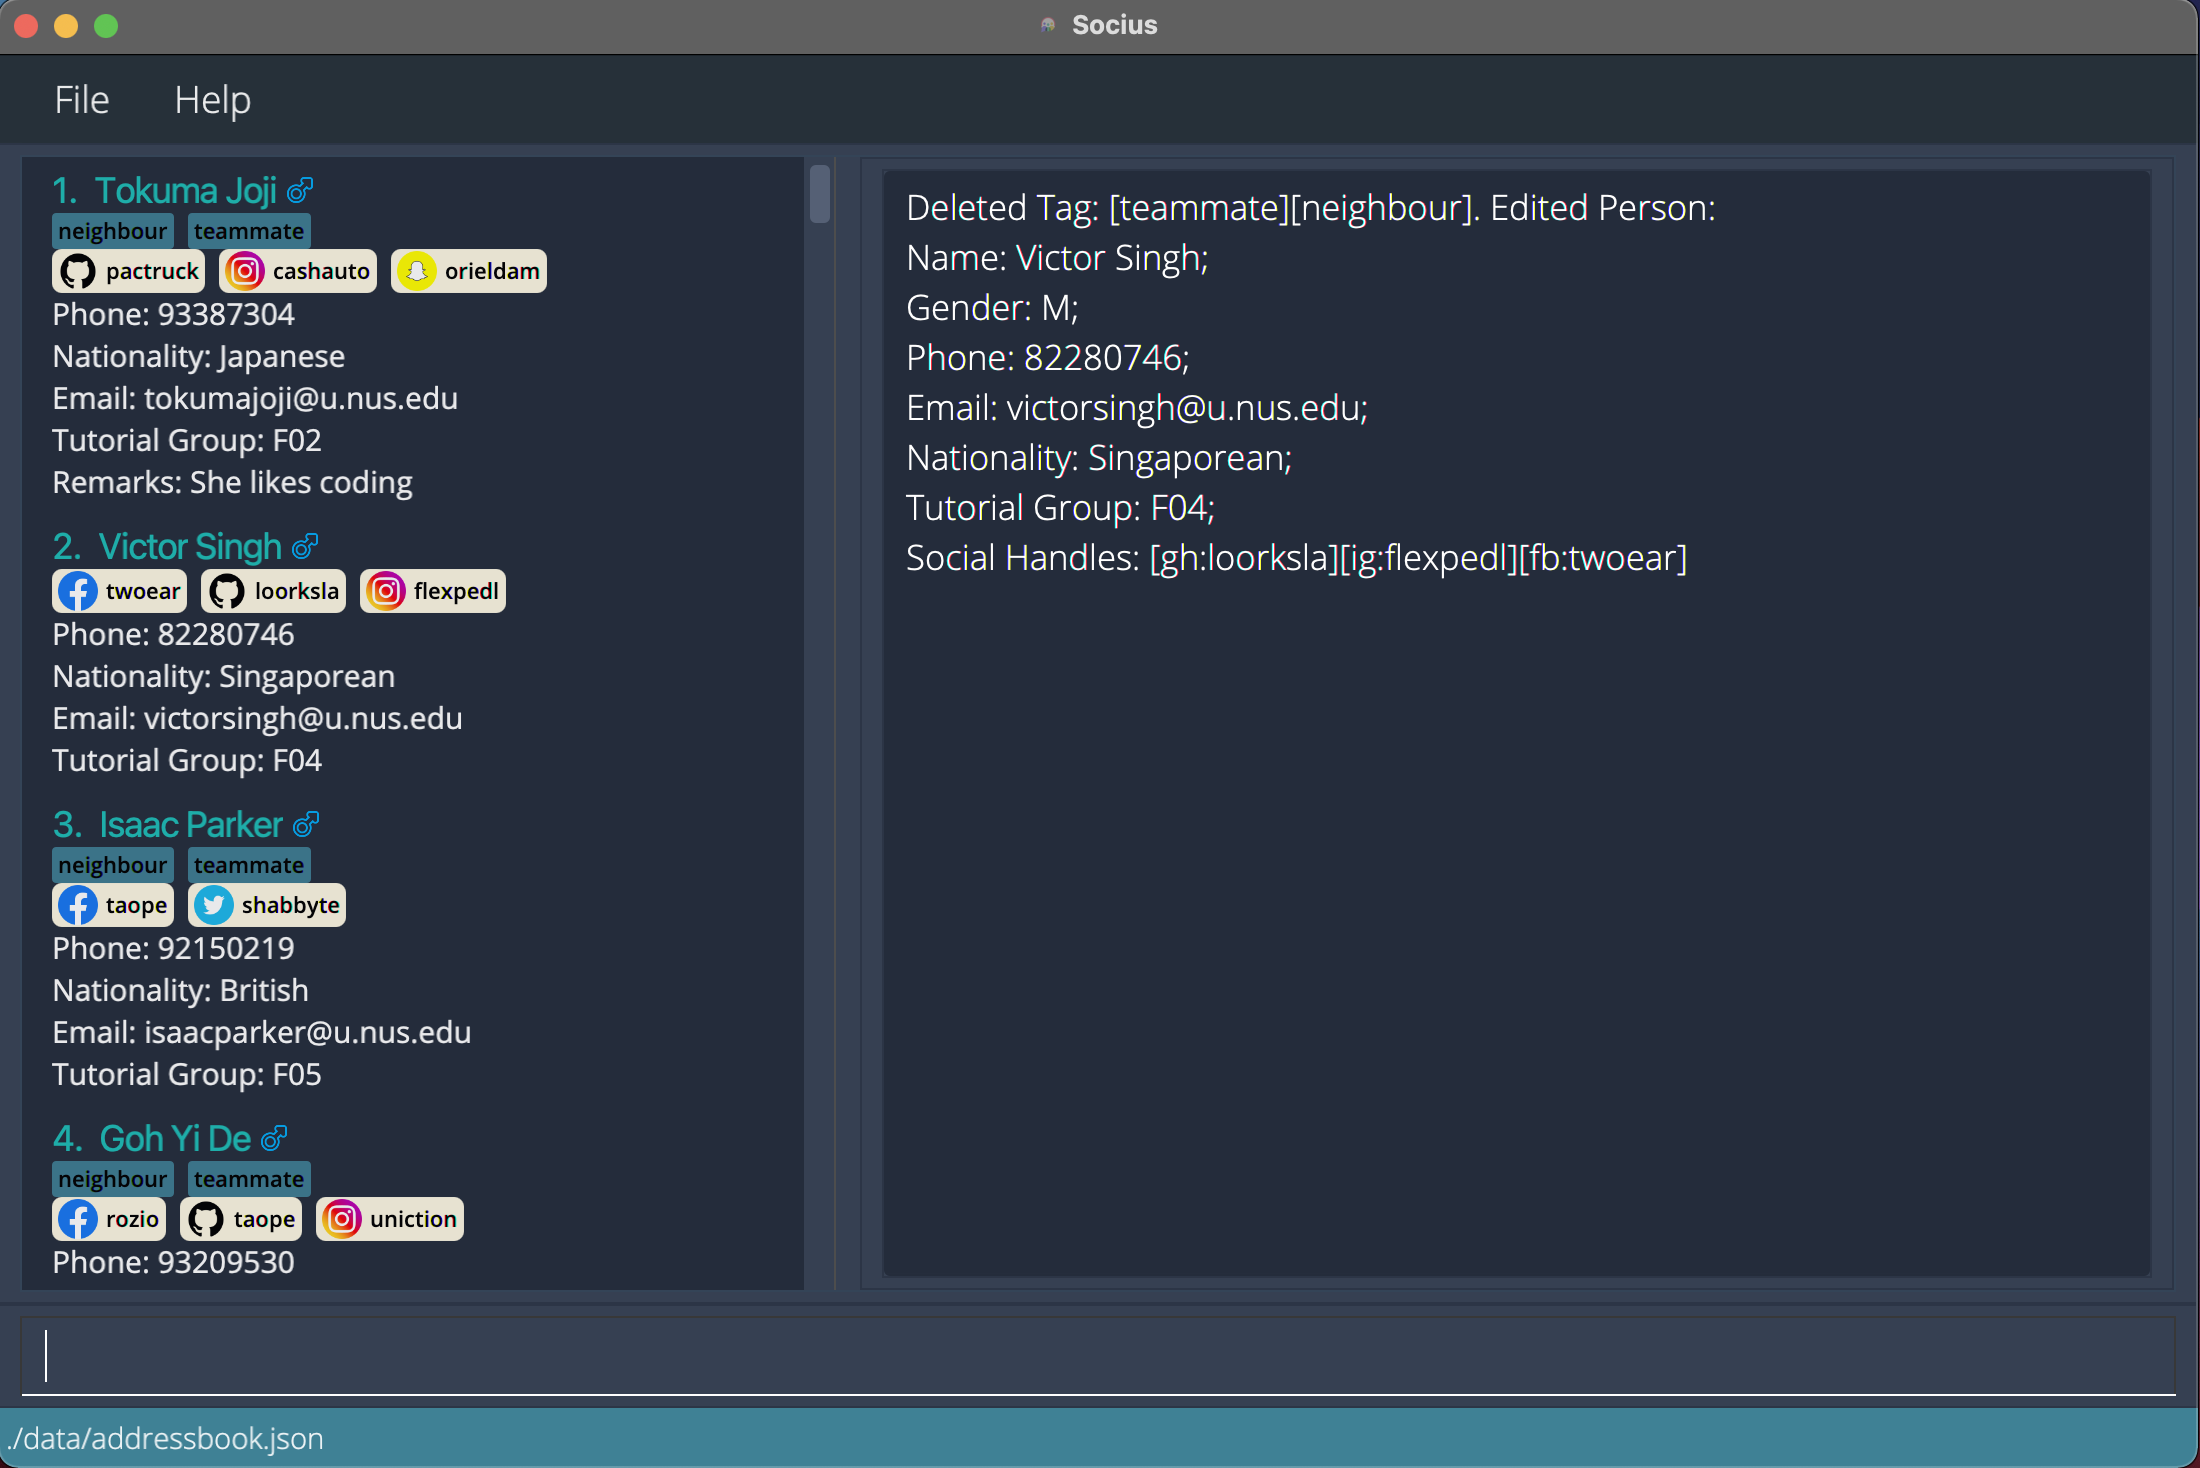 After execution of Delete Tag Command:
 deletet2 t/teammate t/neighbour
Alternate Format: deletet all [t/TAG]…
- Delete tags for everyone in the displayed contact list.
- Existing tag will be removed if one of the input tags matches the existing tag.
- If no
TAGis provided, all tags in the displayed contact list will be deleted. -
TAGis case-sensitive - If there are duplicate people after deleting tags, these tags will not be deleted.
For example:
-
deletetall t/friendafterfindg/fdeletes the ‘friend’ tag for everyone in the filtered list of female contacts. -
deletetall t/teammate t/neighbourdeletes both ‘teammate’ and ‘neighbour’ tags for everyone in the displayed contact list.
Clearing all contacts: clear
You can clear everyone from your contact list with the clear command.
Format: clear
Listing all contacts: list
You can list everyone in your contact list with the list command.
Format: list
Finding people: find
You can find specific people with the find command.
Format: find PREFIX/VALUE [PREFIX/VALUE]…
-
PREFIX/VALUEcan substituted with any of the following:n/NAMEg/GENDERp/PHONE_NUMBERe/EMAILnat/NATIONALITYtg/TUTORIAL_GROUPs/SOCIAL_HANDLEr/REMARKt/TAG
- At least one
VALUEmust be provided. - The
VALUEis case-insensitive. (e.ghanswill matchHans) - People matching all values will be returned (i.e.
ANDsearch).
Examples:
-
findn/Alexreturns alex and Alexandra. -
findn/jack tg/M12returns Jack from tutorial group M12.
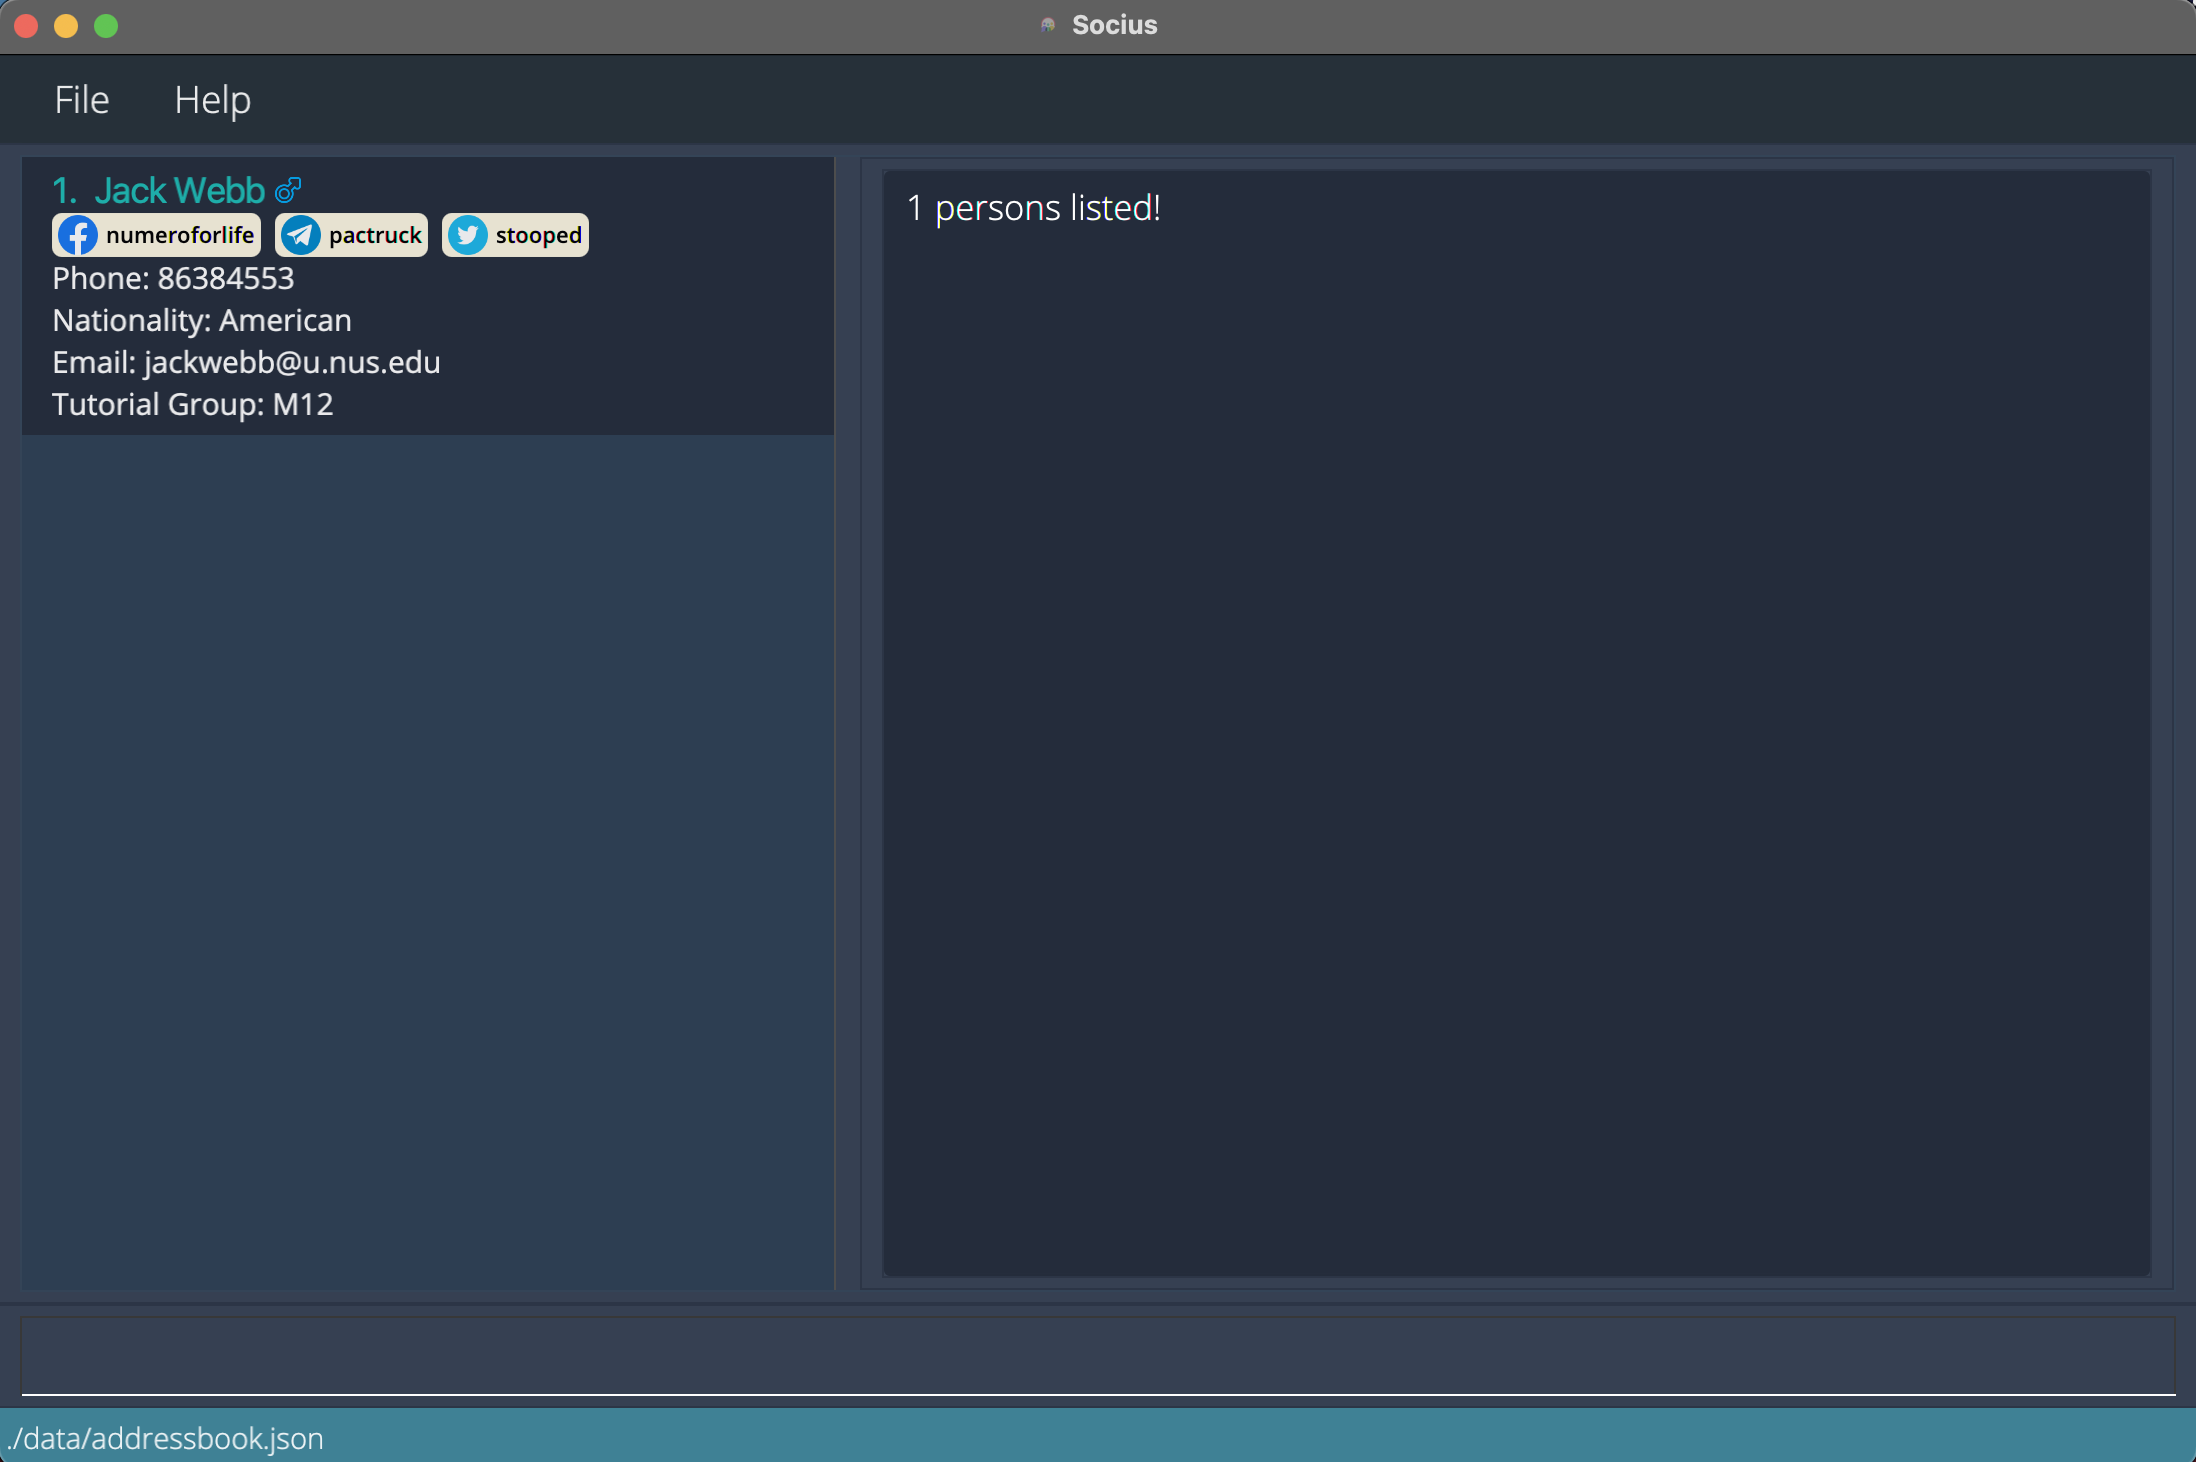 After execution of Find Command:
 findn/jack tg/M12 -
findnat/Singaporeanreturns all Singaporeans.
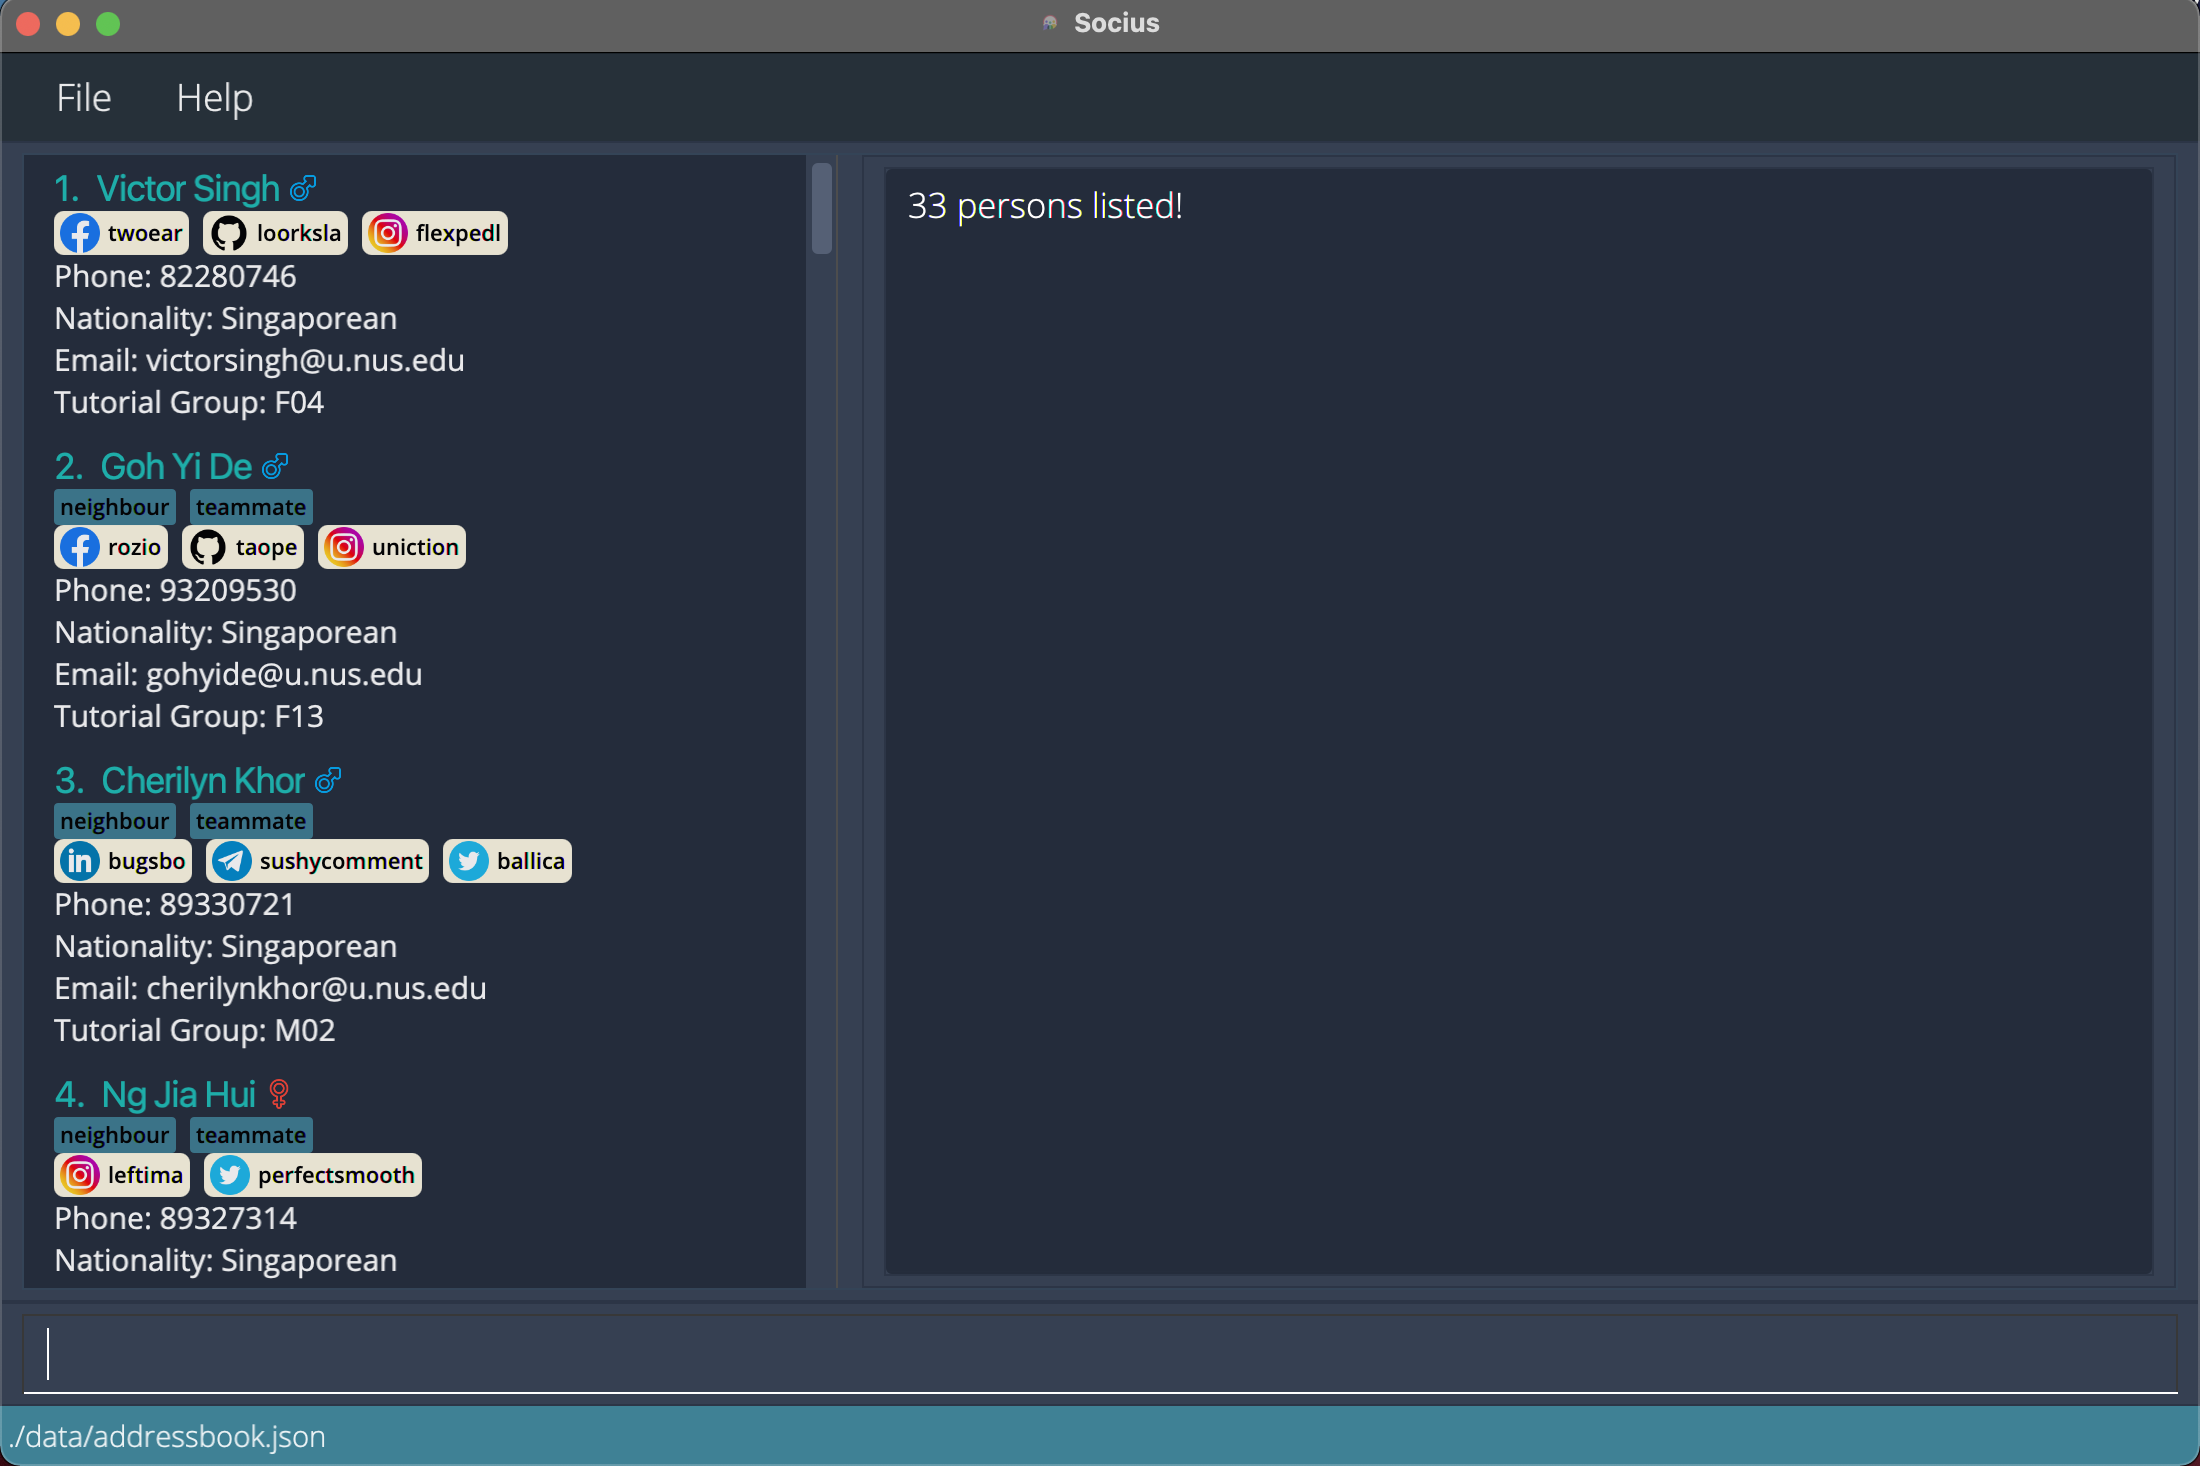 After execution of Find Command:
 findnat/Singaporean
Sorting people: sort
You can sort everyone in the contact book by a specified parameter with the sort command.
Format: sort PREFIX/
-
PREFIX/can substituted with any of the following:n/g/p/e/nat/tg/r/
- If the parameter contains words, everyone is sorted in ascending alphabetical order.
- If the parameter contains numbers, everyone is sorted in ascending numeric order.
Examples:
-
sortn/sorts contacts by name in ascending alphabetical order. -
sorttg/sorts contacts by tutorial group in ascending alphanumeric order.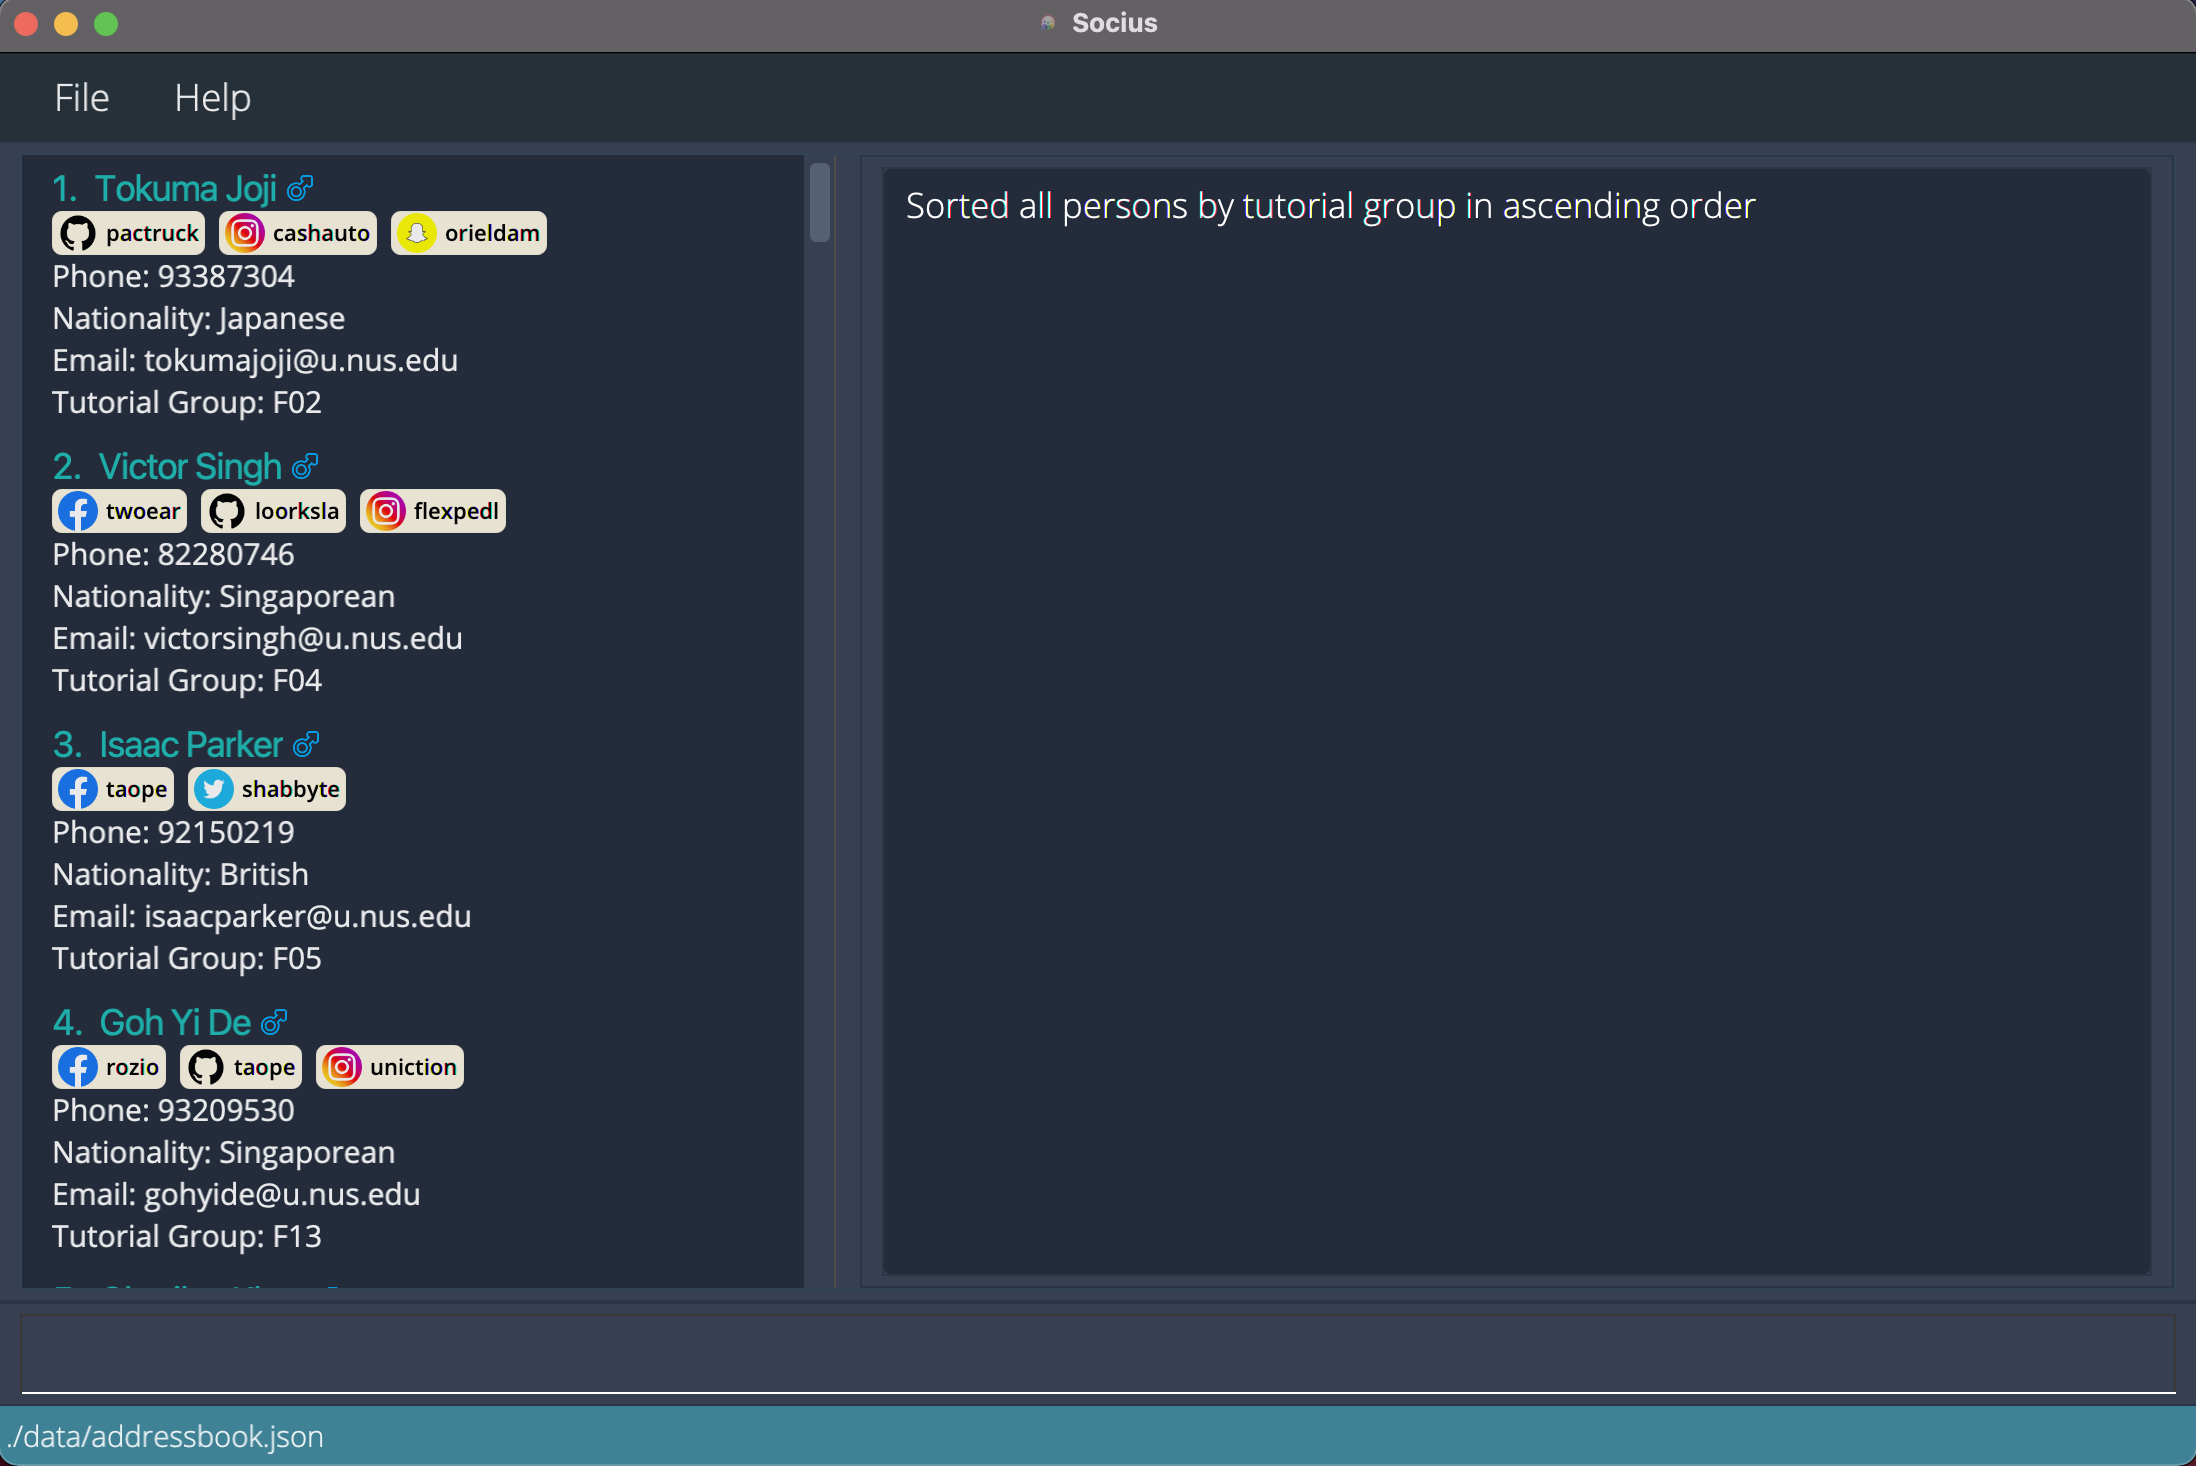 After execution of Sort Command:
 sorttg/
Viewing statistics: stat
You can view the statistics of different nationalities of students from a specified tutorial group with the stat command.
Format: stat TUTORIAL_GROUP
Examples:
-
statT08shows the statistics of the different nationalities of students from tutorial groupT08.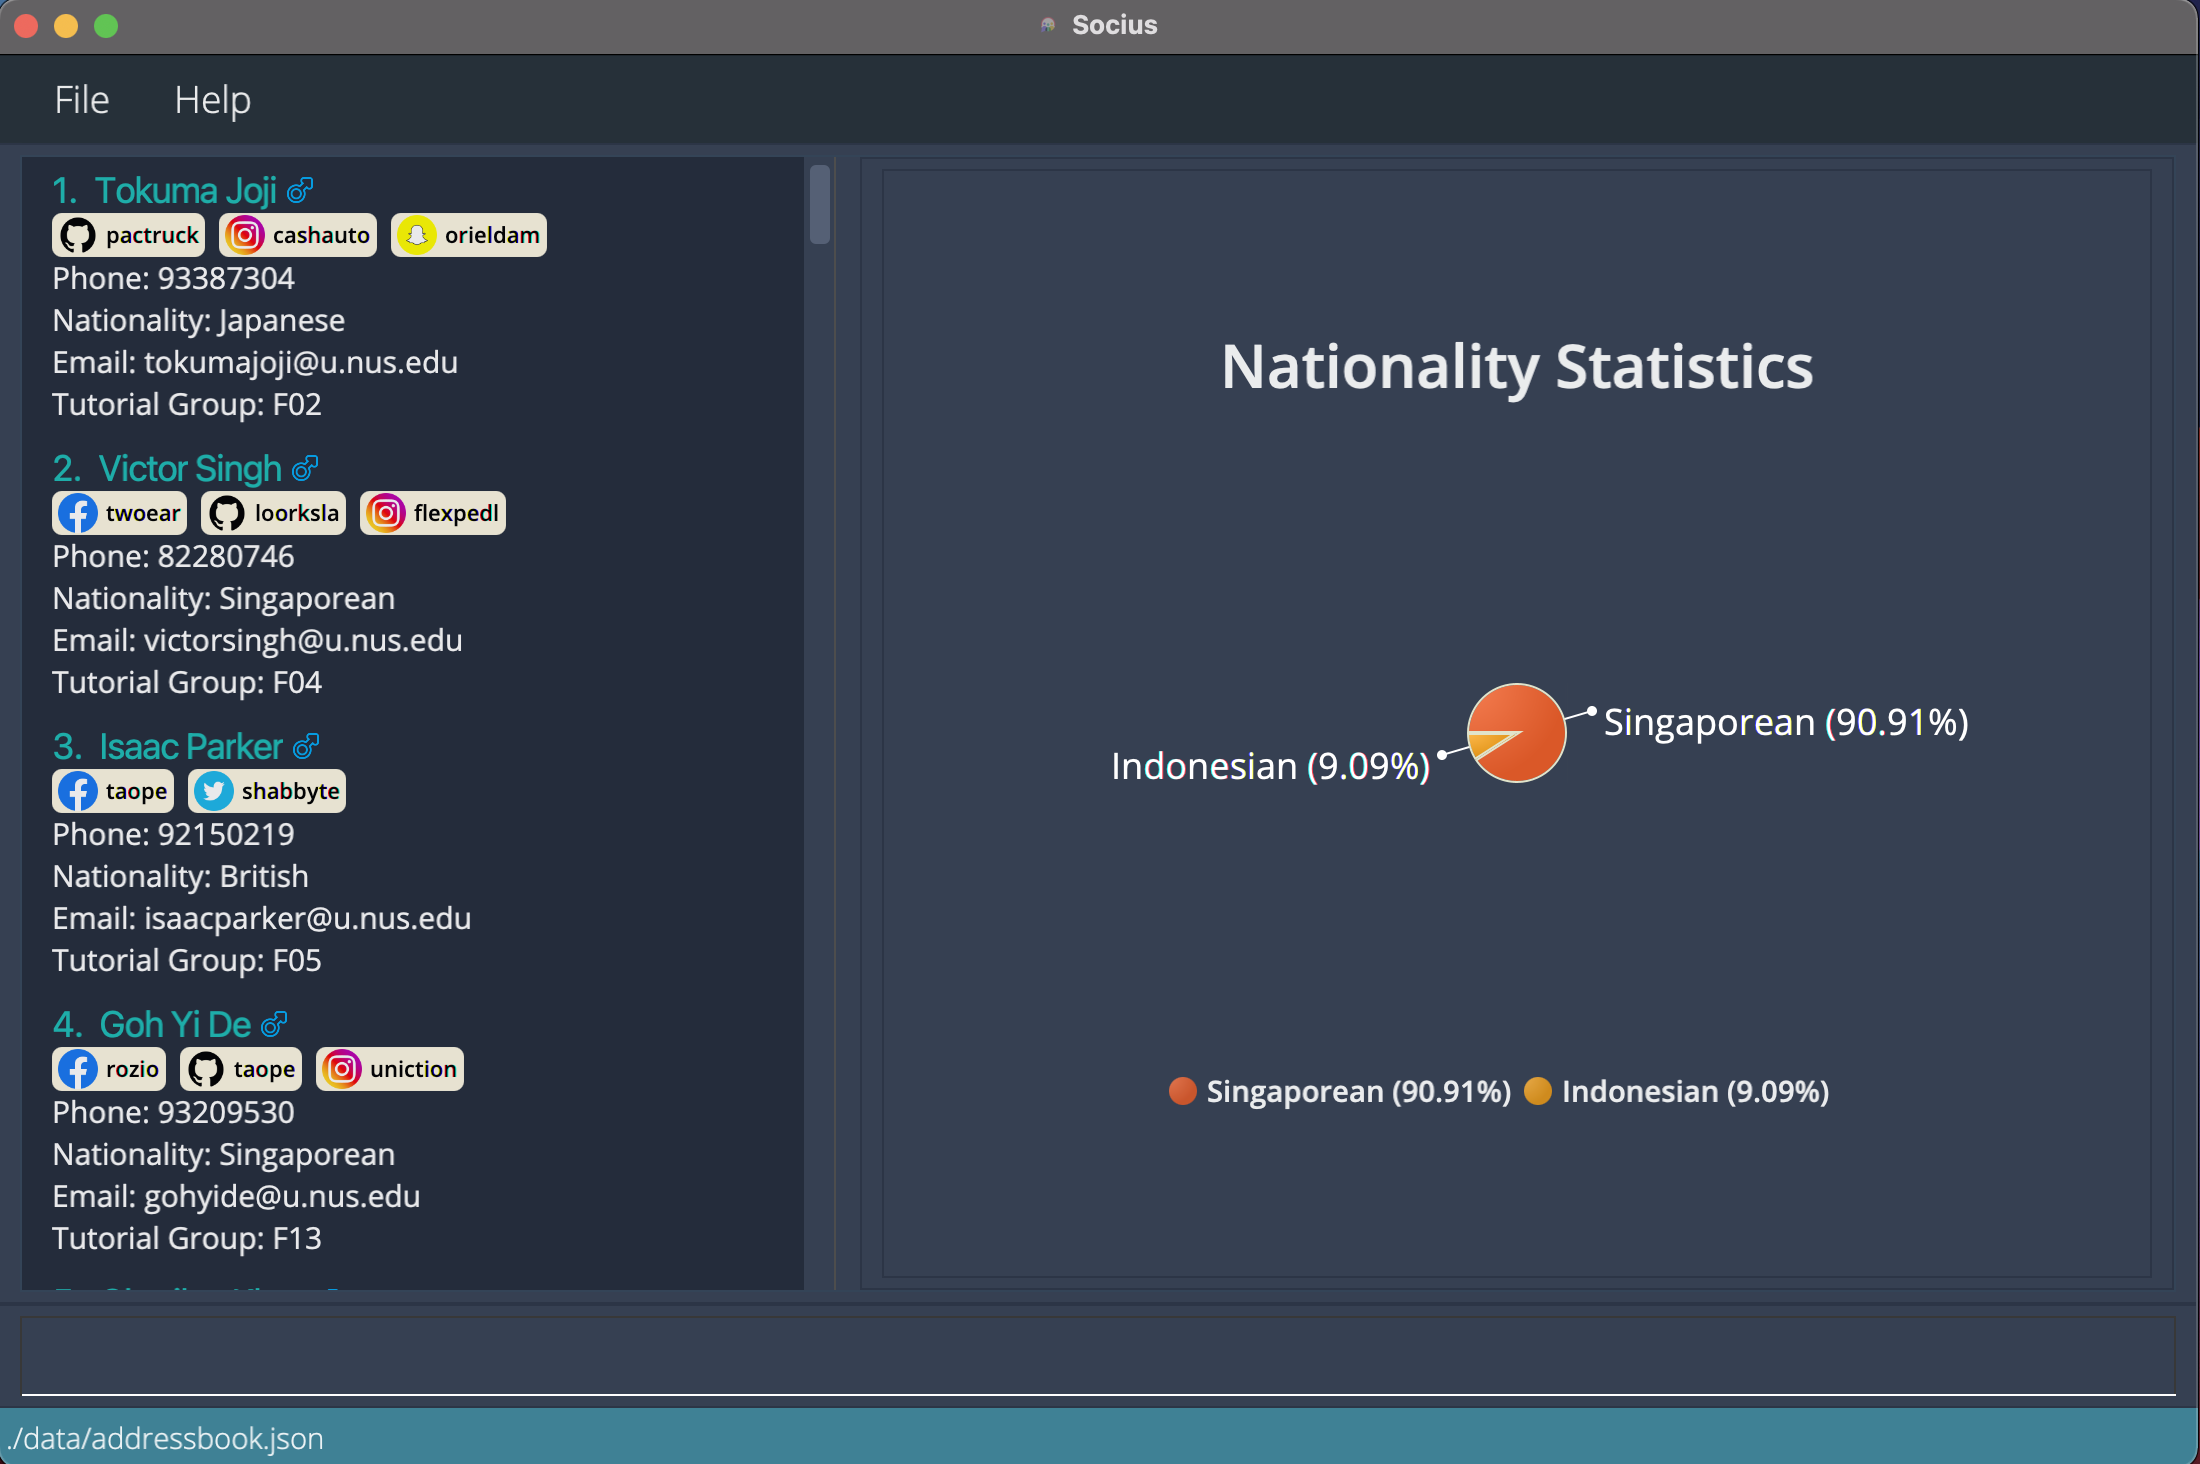 After execution of Stat Command:
 statT08
Importing contacts: import
You can import your friends’ contact book into your contact list with the import command.
Format: import FILE_NAME.json
- The input file must be in the JSON format.
- The input file must be located in the
./datadirectory from the directory whereSocius.jaris located.
Examples:
-
importgroupmates.jsonimports a contact list from a file named groupmates.json into your existing contact list.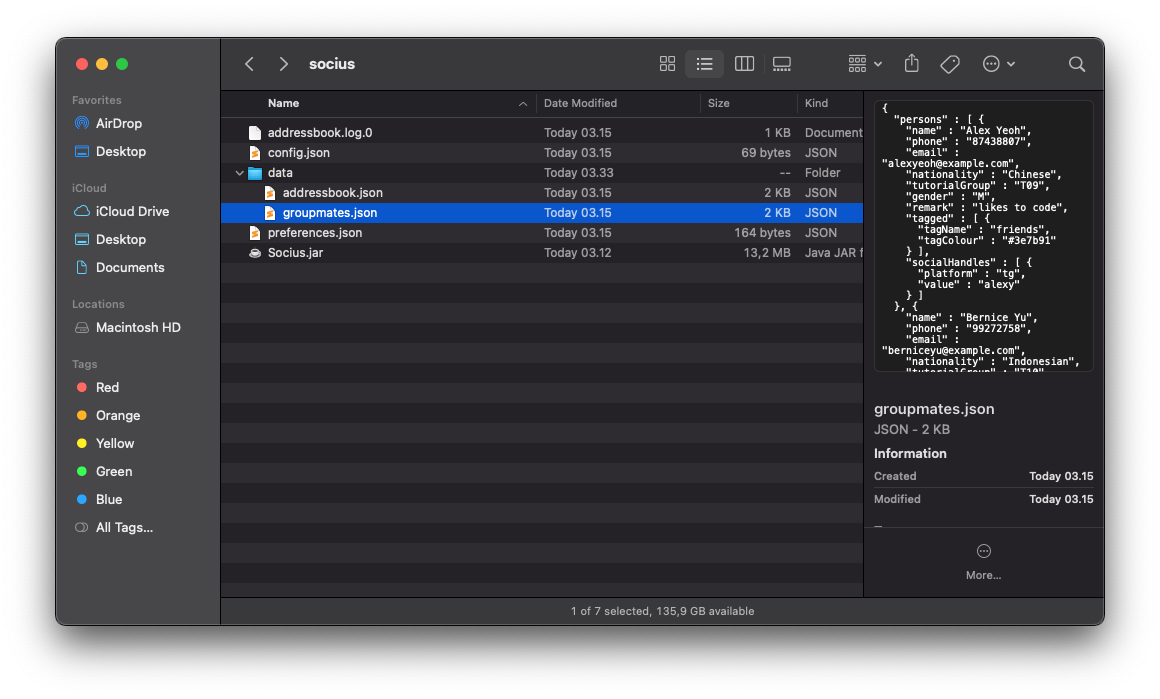 Illustration of where the JSON file should be located
Exporting contacts: export
You can export your contact list and share it with your friends with the export command.
Format: export FILE_NAME.json
- The exported file follows the JSON format.
- The exported file will be stored in the
./datadirectory from the directory whereSocius.jaris located.
Examples:
-
exportfriends.jsonexport your contact list into a file named friends.json.
Aliasing commands: alias
You can create shortcuts by aliasing a command with a custom keyword with the alias command.
This enables you to type the keyword in place of the command.
Format: alias a/KEYWORD c/COMMAND.
- Keywords that are reserved for command cannot be used as
KEYWORD(e.ga/add). - The order of
a/KEYWORDandc/COMMANDdoes not matter.
Examples:
-
aliasa/Singaporeans c/find nat/Singaporean tg/T08maps the keyword ‘Singaporeans’ to theFindcommand to find all Singaporeans from tutorial group T08.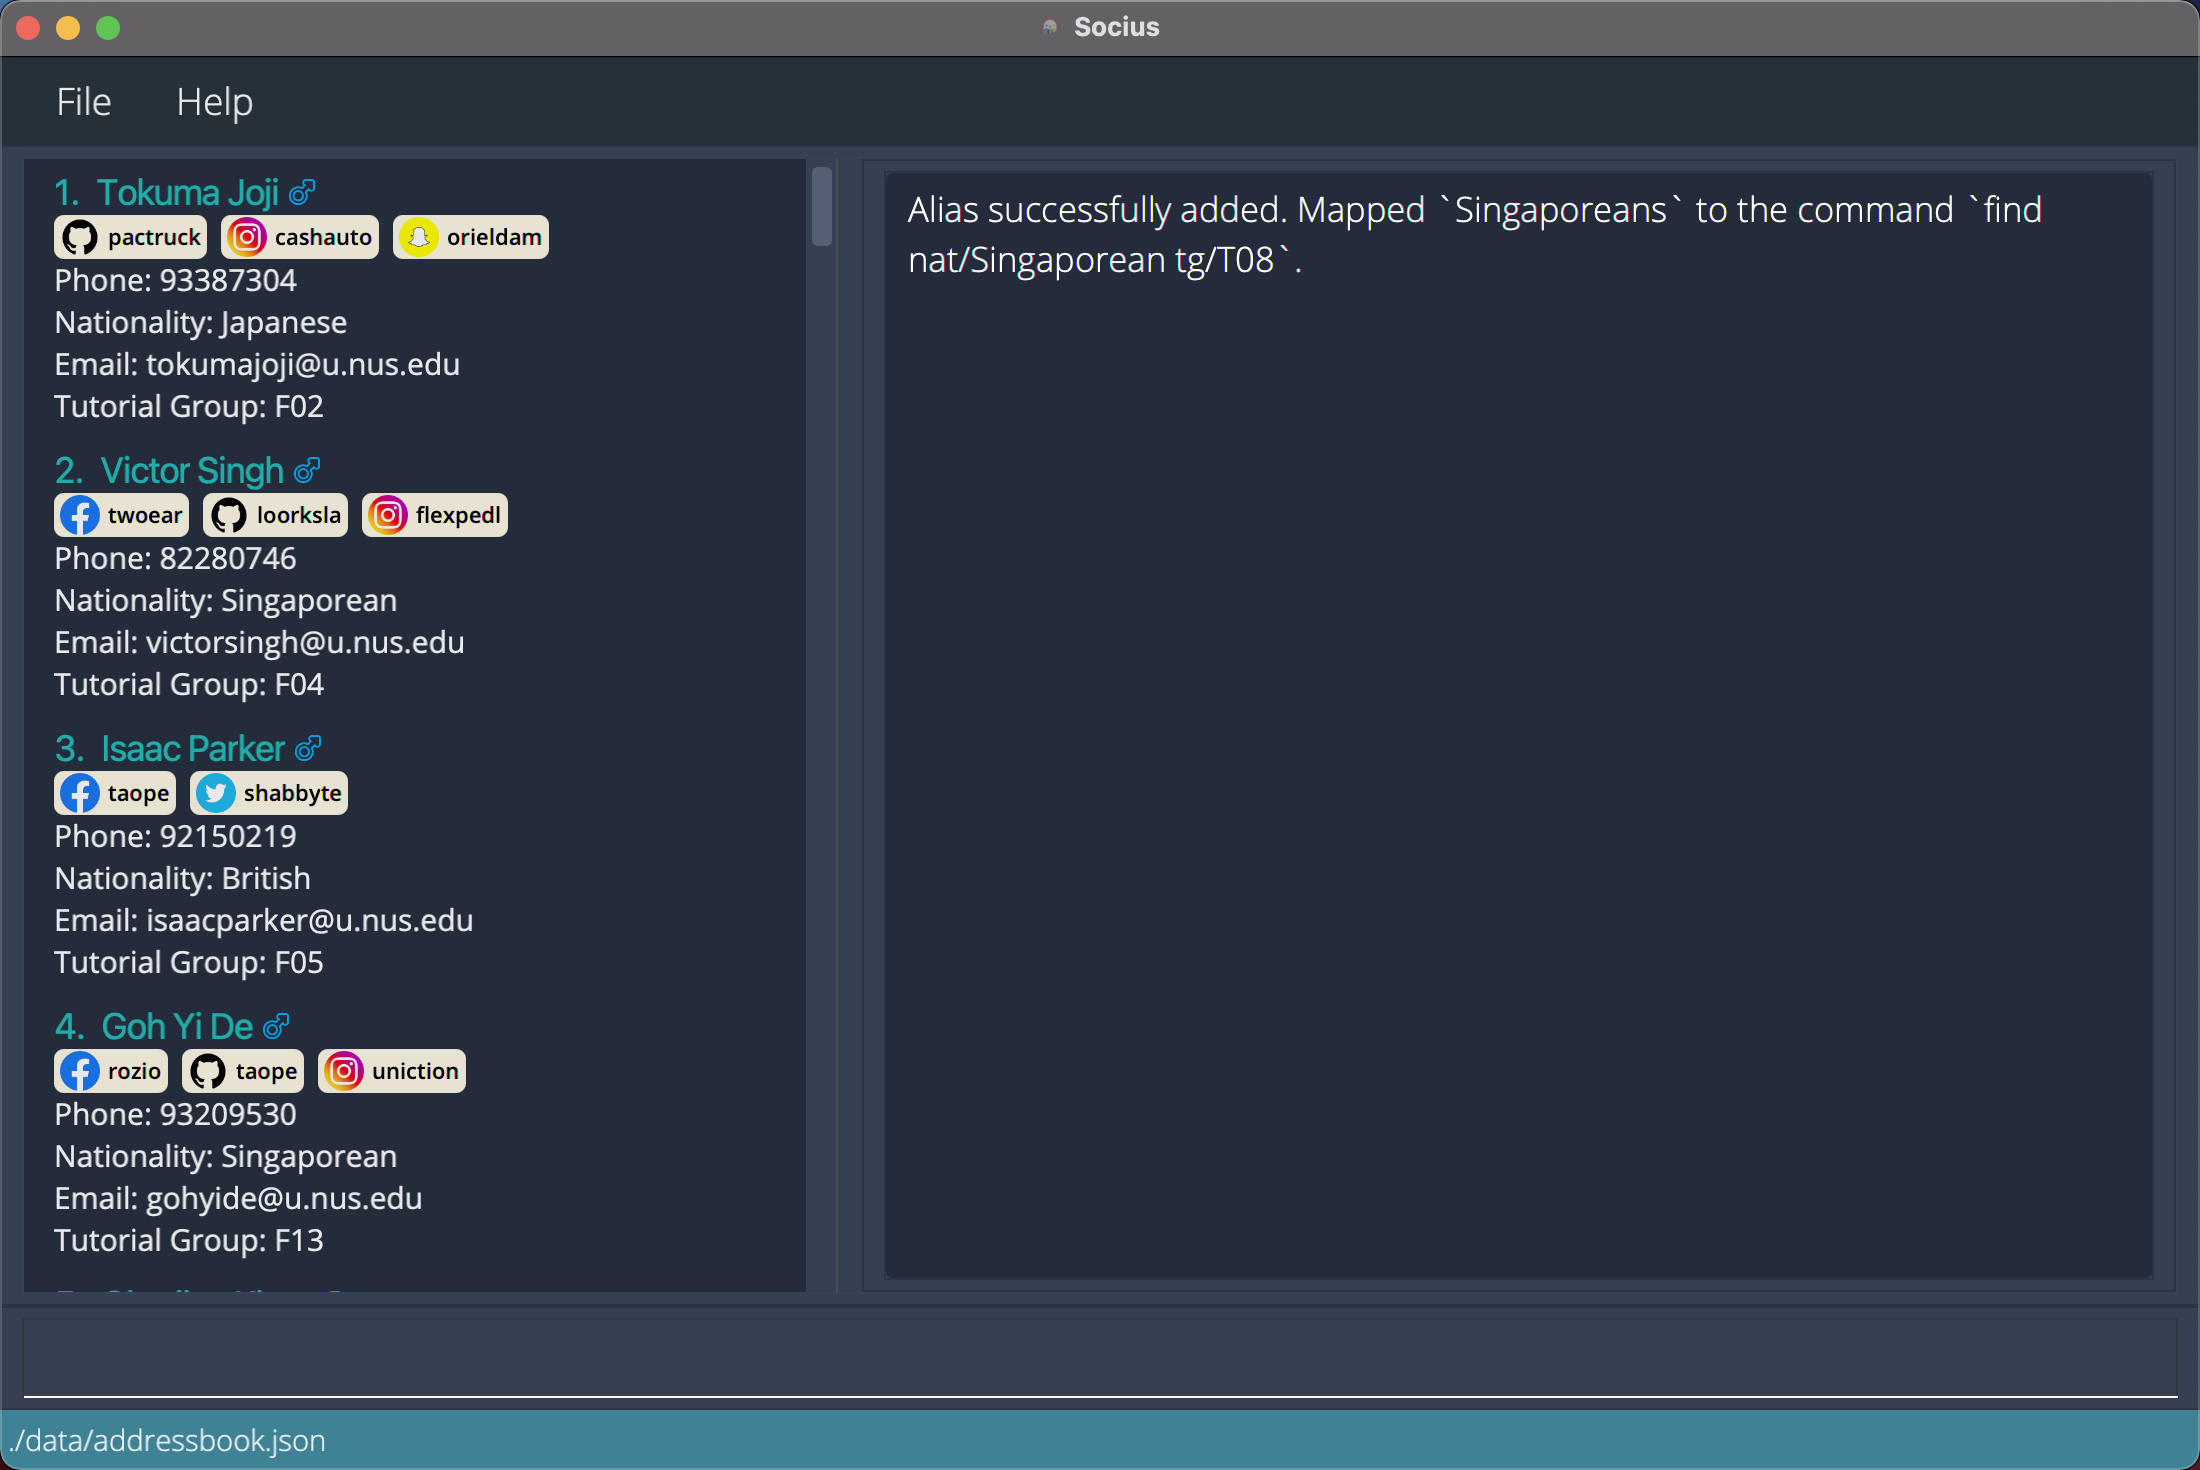 After execution of Alias Command:
 aliasa/Singaporeans c/find nat/Singaporean tg/T08
Exiting Socius: exit
Exits from Socius.
Format: exit
Saving the data
The data in Socius is automatically saved to your computer after the execution of any command that changes the data. There is no need to save manually. The data will be automatically loaded back into Socius on your next use.
Command History
Use the Up or Down arrow keys to navigate through command history. This feature is useful if your command is similar to a previous command, and if you wish to revisit your previous commands.
Parameter Constraints
n/NAME
NAME should only contain alphanumeric characters and spaces.
Example: n/Zayden Tan Bee Hoon
g/GENDER
GENDER should only be M for male, F for female or O for others (case-insensitive).
Examples: g/M, g/f
p/PHONE_NUMBER
PHONE_NUMBER should only contain numbers and optionally start with ‘+’.
PHONE_NUMBER should be at least 3 digits and at most 15 digits long.
Example: +98739283
e/EMAIL
EMAIL should be of the format local-part@domain and adhere to the following constraints:
- The local-part should only contain alphanumeric characters and these special characters:
+_.-. - The local-part may not start or end with any special characters.
- The domain name is made up of domain labels separated by periods.
- The domain name must:
- end with a domain label at least 2 characters long
- have each domain label start and end with alphanumeric characters
- have each domain label consist of alphanumeric characters, separated only by hyphens, if any.
Example: e/e3029834@u.nus.edu
nat/NATIONALITY
NATIONALITY should be found among in this list of nationalities.
Example: nat/Singaporean
tg/TUTORIAL_GROUP
TUTORIAL_GROUP should only contain one letter that is either M/T/W/F followed by two digits.
Example: tg/T09
s/SOCIAL_HANDLE
SOCIAL_HANDLE should be of the format PLATFORM:USERID and adhere to the following constraints:
- Only the following platforms are supported:
Instagram,Telegram,Facebook,Twitter,Github,Linkedin,Snapchat,Discord - The following 2 letter shorthand can be used to replace the full name of their corresponding social platform:
-
igfor Instagram -
tgfor Telegram -
fbfor Facebook -
twfor Twitter -
ghfor Github -
lnfor Linkedin -
scfor Snapchat -
dcfor Discord
-
-
USERIDshould not contain whitespaces
Example: s/tg:alexx9384
r/REMARK
REMARK accepts any values.
Example: r/Stays in PGP
t/TAG
TAG should only contain alphanumeric characters.
Example: t/friends
t/TAG:#HEX_COLOUR
Example: t/friends:#FF0000 for a red colour tag
a/ALIAS
ALIAS can take any values except keywords that are reserved for command.
Example: a/findAlex
c/COMMAND
COMMAND must be a valid command.
Example: c/find n/Alex
FAQ
Q: How do I transfer my data to another computer?
A: The following are the steps to transfer your data to another computer.
- Install Socius on the other computer.
- Export your existing Socius contact list to a JSON file.
- Copy this JSON file from your computer.
- Paste this JSON file to the
./datadirectory from the directory whereSocius.jaris located. - Import your contact list from this JSON file to Socius in the other computer.
Q: Can I edit the data file directly?
A: Socius data are saved as a JSON file (i.e. SOCIUS_JAR_FILE_LOCATION/data/addressbook.json).
Advanced users are welcome to update data directly by editing that data file.
Glossary
| Word | Meaning |
|---|---|
| Command History | Previous commands that have been inputted by the user |
| Command Line Interface | An interface that processes commands to a program in the form of lines of text |
| Graphical User Interface | An interface that allows users to interact with the system through graphical elements such as buttons and icons |
| Social Handle | Public username of a social media account |
Authors
This User Guide is co-written by Hsiao Ting, Choon Yong, Kevin, Boon Kee and Nathan. We are a group of Computer Science students from the National University of Singapore, and members of AY2022S1-CS2103T-W08-4.
Command Summary
General
| Command | Format | Examples |
|---|---|---|
| Help | help |
help |
| Exit | exit |
exit |
Modify
| Command | Format | Examples |
|---|---|---|
| Add |
add n/NAME [p/PHONE_NUMBER] [e/EMAIL] [nat/NATIONALITY] [g/GENDER] [tg/TUTORIAL GROUP] [s/SOCIALHANDLE]… [r/REMARK] [t/TAG]…
|
add n/James Ho p/22224444 e/jamesho@example.com g/M tg/T12 s/tg:friendlyjames r/Friendly t/colleague
|
| Addt |
addt INDEX t/TAG [t/TAG]… or all t/TAG [t/TAG]…
|
addt 1 t/friend t/teammate
|
| Remark |
remark INDEX [r/REMARK]
|
remark 2 r/She likes coding
|
| Edit |
edit INDEX PREFIX/VALUE [PREFIX/VALUE]…
|
edit 1 s/tg:dogcatdonkey43 s/ig:applegrapeorange32 t/teammates e/wfeewf@gmail.com g/M nat/Singaporean
|
| Delete |
delete INDEX
|
delete 3
|
| Deletet |
deletet INDEX t/TAG [t/TAG]… or all t/TAG [t/TAG]…
|
deletet all t/teammate
|
| Deletem |
deletem PREFIX/VALUE [PREFIX/VALUE]…
|
deletem n/James g/f
|
| Clear | clear |
clear |
View
| Command | Format | Examples |
|---|---|---|
| List | list |
list |
| Find |
find PREFIX/VALUE [PREFIX/VALUE]…
|
find g/F tg/07
|
| Sort |
sort PREFIX/
|
sort n/
|
| Stat |
stat TUTORIAL_GROUP
|
stat T09
|
Share
| Command | Format | Examples |
|---|---|---|
| Import | import |
import contactbook.json
|
| Export | export |
export contactbook.json
|
Advance
| Command | Format | Examples |
|---|---|---|
| Alias |
alias a/KEYWORD c/COMMAND
|
alias a/allFemales c/find g/f
|